 |
|
 08-16-2015, 11:10 PM
|
#61
|
|
Platinum Member
Join Date: Dec 2014
Location: East of world famous Sedro Woolley, west of Concrete
Posts: 210
|
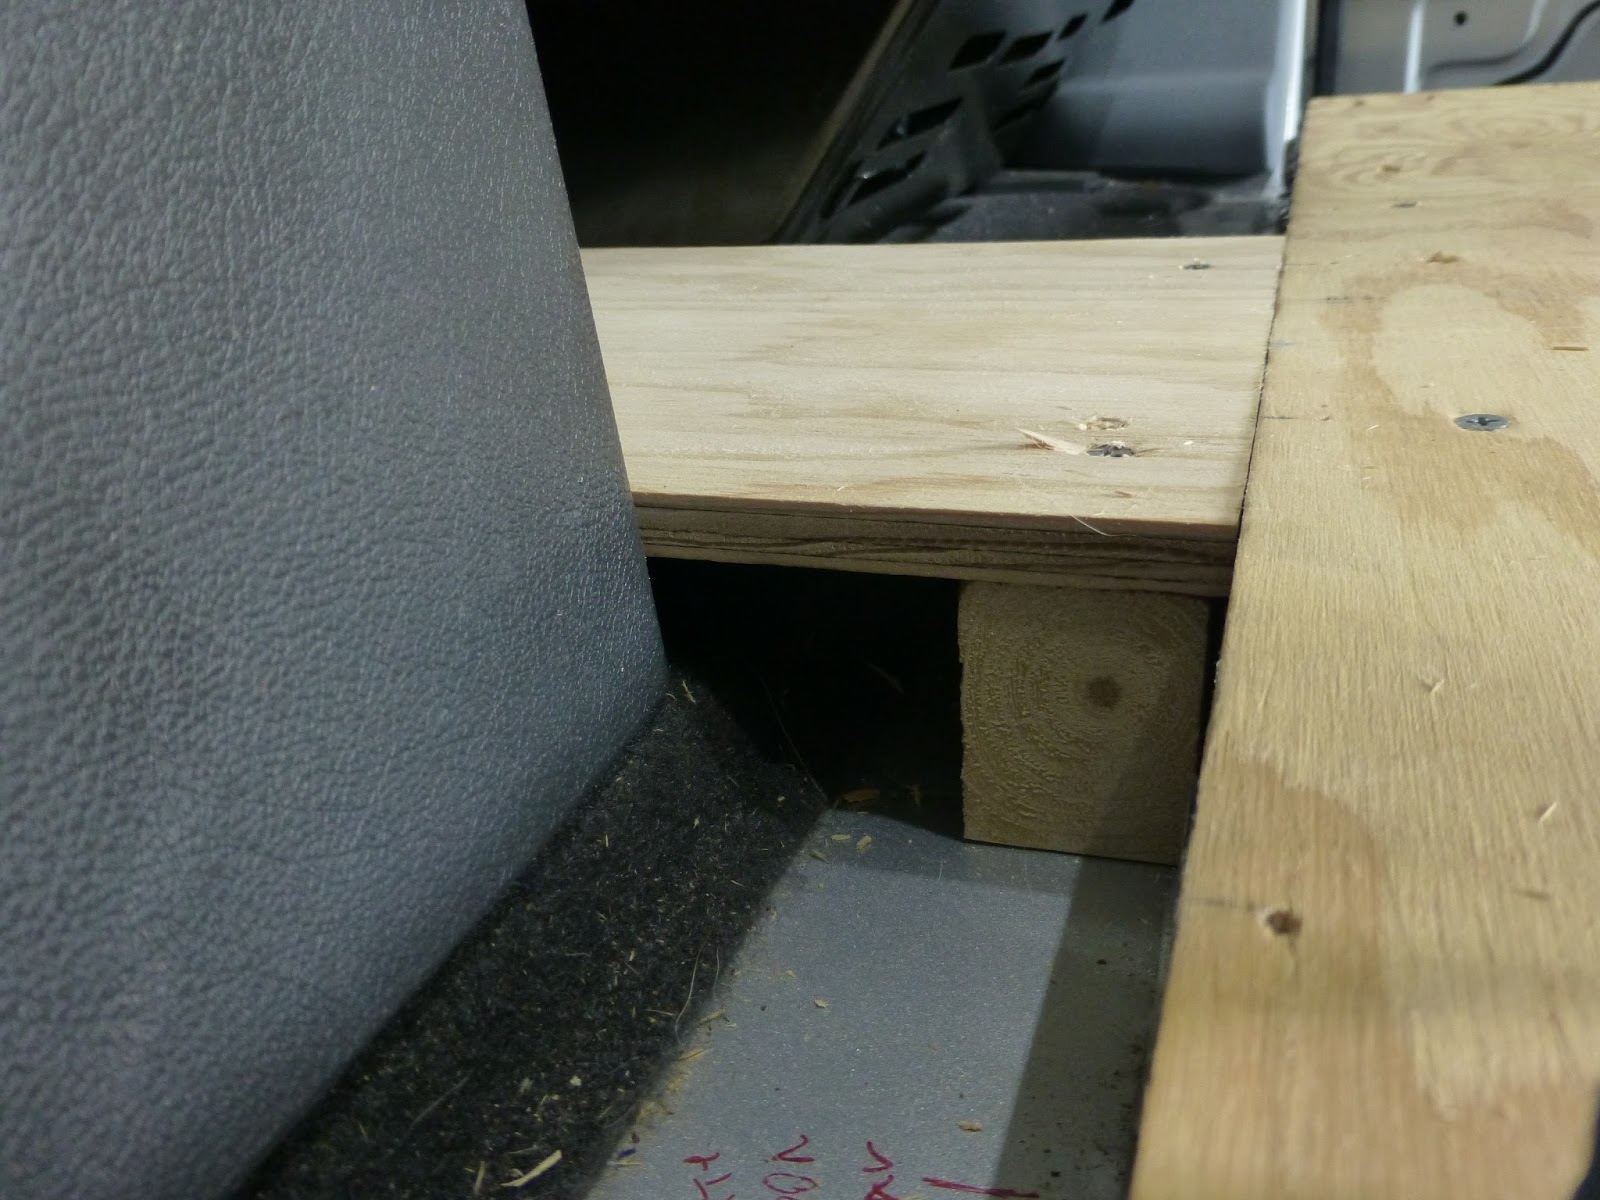
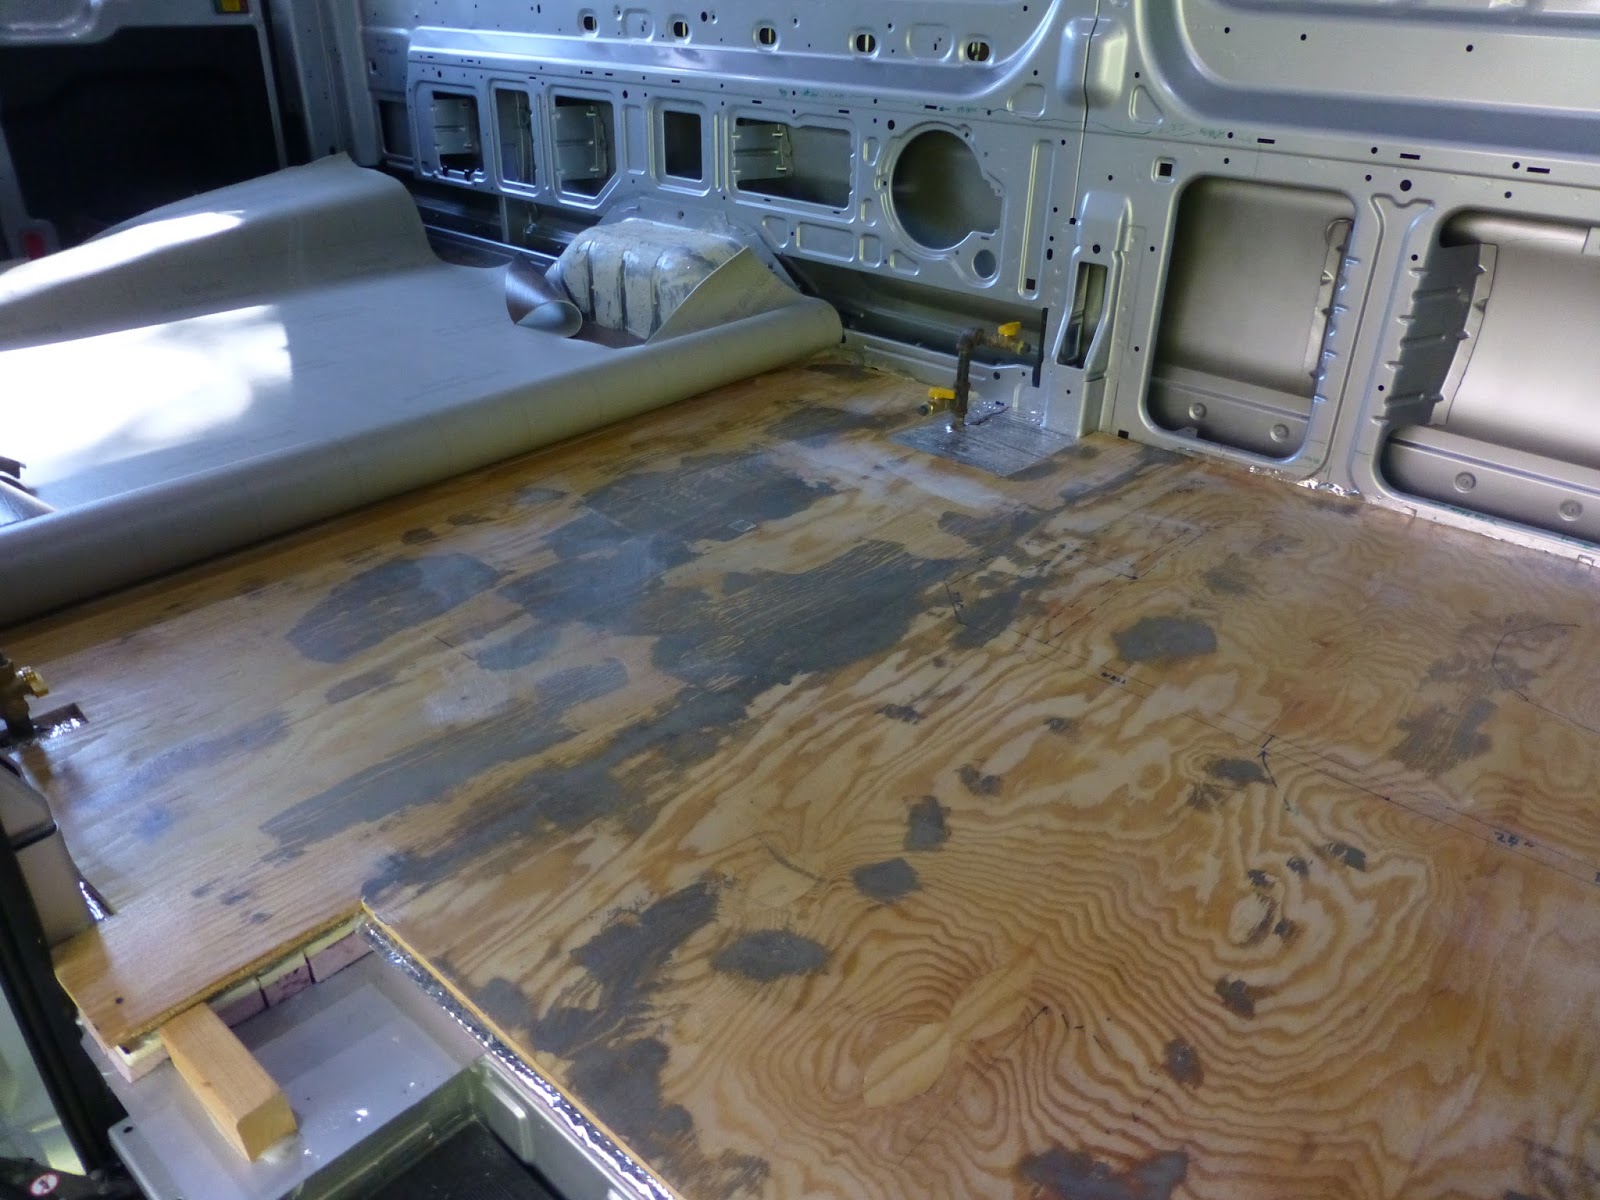
 Laying the Vinyl Floor, Part 1
We made a ramp to smoothly merge our floor with the Transit's sloped floor (over the tranny) between the front seats.
__________________
Turning a 2015 Ford Transit into a camper. Her name is Annie.
You can watch it all happen here:
https://anniebuild.blogspot.com/
Now, with trip reports!!!! 
|

|

|
|
08-16-2015, 11:11 PM
|
#62
|
|
Platinum Member
Join Date: Dec 2014
Location: East of world famous Sedro Woolley, west of Concrete
Posts: 210
|
Then we made sure all the floor mounting screw heads were below the floor surface and leveled the depressions.
Sanded it all smooth.
__________________
Turning a 2015 Ford Transit into a camper. Her name is Annie.
You can watch it all happen here:
https://anniebuild.blogspot.com/
Now, with trip reports!!!!
|
|
|
|
|
08-16-2015, 11:11 PM
|
#63
|
|
Platinum Member
Join Date: Dec 2014
Location: East of world famous Sedro Woolley, west of Concrete
Posts: 210
|
The vinyl we liked came in a 12' wide roll., We wanted to avoid any seams, so we got a ~17' length, and end up with about twice as much as we need for Annie. Not yet sure what we'll use the leftover length for, but it might work out nicely for a hoped for bathroom remodel.
Anyways, we cut it in half. Snap line is used to mark the cut line.
Cut the roll with a sawsall. Loaded our preferred half into Annie
It's really cushy, flexible stuff!
__________________
Turning a 2015 Ford Transit into a camper. Her name is Annie.
You can watch it all happen here:
https://anniebuild.blogspot.com/
Now, with trip reports!!!!
|
|
|
|
|
08-16-2015, 11:12 PM
|
#64
|
|
Platinum Member
Join Date: Dec 2014
Location: East of world famous Sedro Woolley, west of Concrete
Posts: 210
|
And began slicing and dicing.
All cut and ready for glue down. We'll work on that and finishing touches in part 2 of this riveting saga.
__________________
Turning a 2015 Ford Transit into a camper. Her name is Annie.
You can watch it all happen here:
https://anniebuild.blogspot.com/
Now, with trip reports!!!!
|
|
|
|
|
08-27-2015, 07:57 PM
|
#65
|
|
Platinum Member
Join Date: Dec 2014
Location: East of world famous Sedro Woolley, west of Concrete
Posts: 210
|
Laying the Vinyl Floor, Part 2
It's time to glue down the floor.
We did this one half at a time to minimize any shifting.
We rolled back the vinyl and applied the glue. Let it set for about an hour.
Then unfolded the vinyl and squashed it onto the glued floor. We used a rolling pin to push out any bubbles.
We let it rest overnight,and trimmed the vinyl to it's final size. We made up some cedar trim boards, cut them to size, painted them with Varithane spar varnish (2 coats) and glued them to Annie's chassis and the floor. We used 3M 90 spray adhesive for the chassis and TiteBond III for the floor. We added the cedar at the slider and at the rear entrance.
Then we added the edge trim. Most of it is step edging.
__________________
Turning a 2015 Ford Transit into a camper. Her name is Annie.
You can watch it all happen here:
https://anniebuild.blogspot.com/
Now, with trip reports!!!!
|
|
|
|
|
08-27-2015, 07:58 PM
|
#66
|
|
Platinum Member
Join Date: Dec 2014
Location: East of world famous Sedro Woolley, west of Concrete
Posts: 210
|
Cutting the trim was a bit tricky.
The boss dropped by and gave her approval (whew!).
Added the rear trim.
Added a little cedar shelf, and the floor is done!
__________________
Turning a 2015 Ford Transit into a camper. Her name is Annie.
You can watch it all happen here:
https://anniebuild.blogspot.com/
Now, with trip reports!!!!
|
|
|
|
|
08-28-2015, 01:55 PM
|
#67
|
|
Platinum Member
Join Date: Jun 2012
Location: SoCal
Posts: 792
|
Thanks for the update. Looking good. Should be ready by next spring eh (ay) ?
|
|
|
|
|
08-28-2015, 02:31 PM
|
#68
|
|
Platinum Member
Join Date: Dec 2014
Location: East of world famous Sedro Woolley, west of Concrete
Posts: 210
|
Yup, that's the plan!
Deciding on the next step is a bit of a puzzlement. I want to get the exterior holes cut early, for stuff like the H2O and house heaters, fresh water inlet, and the water drains installed, but those appliances will probably get in the way of working on the wall/ceiling insulation & paneling. However, installing the wall and ceiling panels will get in the way of measuring and cutting those holes. Yet I don't want to leave the holes open during the wet season.
I suspect that I'll end up cutting first, and making some sort of temporary covers. Then proceed with insulation, electrical runs, plumbing, paneling, cabinet and appliance framing, water tank install, final electric and plumbing hookups, and the bed frame, in roughly that order.
Comments and suggestions are welcome!
__________________
Turning a 2015 Ford Transit into a camper. Her name is Annie.
You can watch it all happen here:
https://anniebuild.blogspot.com/
Now, with trip reports!!!!
|
|
|
|
|
09-24-2015, 02:40 PM
|
#69
|
|
Platinum Member
Join Date: Dec 2014
Location: East of world famous Sedro Woolley, west of Concrete
Posts: 210
|
Things have been kind of on hold while we went through some window hassles. You can read about that in my blog.
But now we're able to make some progress on the build.
I figured I'd start catching up with the ceiling insulation to date. (Hint, it is still a work in progress.)
The ceiling insulation will be 1.5" of foil backed rigid foam, with a layer of reflectix between the foam boards and the bead-board that will be the finished ceiling. The foam is mounted with VHB.
Because of the window hassles, I've only done the first layer so far.
The layer is sealed with expanding foam.
The first layer is 1" thick board, the second will be half inch thick. I will also foam the edges of the second board.
There will be a layer of Reflectix after that, and then the actual birch bead-board ceiling. Power for ceiling can lights will run between the Reflectix and the 1/2" foam board, with adequate service loop wherever we end up mounting the lights. Determining that is something that will be done experimentally.
__________________
Turning a 2015 Ford Transit into a camper. Her name is Annie.
You can watch it all happen here:
https://anniebuild.blogspot.com/
Now, with trip reports!!!!
|
|
|
|
|
09-24-2015, 02:44 PM
|
#70
|
|
Platinum Member
Join Date: Dec 2014
Location: East of world famous Sedro Woolley, west of Concrete
Posts: 210
|
Batteries are heavy!!!
I fnally picked up (with difficulty...I'd like to claim one under each arm, but that would be a slight exaggeration) a couple of 4D size AGM batteries. (about 200AH each). They weigh about 125lb each. The battery tray is quite a bit bigger than them, and is rated to support 400 pounds.
I made up some spacers to keep the batteries from sliding around, and strapped them in.
It works pretty well, but I may end up with some sort of turnbuckle hold-down to replace the straps.
The only problem occurs when going up a hill. The stock latch is completely inadequate to keep the tray from sliding open. I cannot understand how the manufacturer thinks that dinky latch can hold back 250lbs. You may remember that latch from when I installed the slide:
So, I added a couple of additional latches.
Made 'em out of 1" wide, 1/4" aluminum stock. Two pieces are VHB'd together to make a 1/2" thick unit. Perfect clearance. The pieces are long enough to just touch the top of the tray (under the lip) and the bottom of the base. They are held in place by 1/4" bolts and nylocks.
__________________
Turning a 2015 Ford Transit into a camper. Her name is Annie.
You can watch it all happen here:
https://anniebuild.blogspot.com/
Now, with trip reports!!!!
|
|
|
|
|
10-03-2015, 02:45 PM
|
#71
|
|
Platinum Member
Join Date: Dec 2014
Location: East of world famous Sedro Woolley, west of Concrete
Posts: 210
|
Ceiling insulation, part two
Now we're adding the second level of rigid foam to the ceiling.
First, I needed to snake the solar panel cable out of the way and down where the controller will live.

The cable is routed through the channel above the rear window, and down the rearmost sidewall post.
Prepped the controller's mounting place with VHB
Zip tied the cable to a sidewall support.
__________________
Turning a 2015 Ford Transit into a camper. Her name is Annie.
You can watch it all happen here:
https://anniebuild.blogspot.com/
Now, with trip reports!!!!
|
|
|
|
|
10-03-2015, 02:46 PM
|
#72
|
|
Platinum Member
Join Date: Dec 2014
Location: East of world famous Sedro Woolley, west of Concrete
Posts: 210
|
Ceiling insulation, part two a
Now we're ready to add the second layer of polyiso rigid foam.This is pretty much a repeat of the first layer's procedure. We are almost exclusively using VHB tape as our adhesive. Then adding expanding foam around each board's perimeter.
As you can see, the rigid foam is only being run in between the ceiling ribs. We'll be adding Reflectix across the whole ceiling (including ribs), but with about a 1/2" space between the Reflectix and the rib/foam boards. I'll talk about this more in Ceiling insulation, part three...coming soon to a device near you.
The front section of ceiling was the most challenging, because it has a complex curve and some fancy shmancy stamping. The initial foam layer was 1/2", which brought the foam below the fancy shmancy stuff. I had originally planned to also make the second layer from 1/2" foam panel, because I was concerned that I wouldn't be able to form that curve with a thicker panel.. Unfortunately, I was running very low on 1/2". Wasn't enough to cover with one piece.
So I decided to try the 1" stuff. With a bit of crunching with my roller pin, I was able to make it conform pretty well.
So I used just a teeny a bit extra VHB. Hopefully it's enough to hold up the 5lb worth of foam board. 
Cut the board to size and to clear the Transit's Styrofoam airbag covers.
__________________
Turning a 2015 Ford Transit into a camper. Her name is Annie.
You can watch it all happen here:
https://anniebuild.blogspot.com/
Now, with trip reports!!!!
|
|
|
|
|
10-03-2015, 02:47 PM
|
#73
|
|
Platinum Member
Join Date: Dec 2014
Location: East of world famous Sedro Woolley, west of Concrete
Posts: 210
|
Ceiling insulation part two b
(Pics split because of 4 pics/post limit)
Mounted the board, added spray foam, and this step is done. (Well, as soon as I remove the painter's tape and plastic sheet.)
__________________
Turning a 2015 Ford Transit into a camper. Her name is Annie.
You can watch it all happen here:
https://anniebuild.blogspot.com/
Now, with trip reports!!!!
|
|
|
|
|
10-03-2015, 03:45 PM
|
#74
|
|
Platinum Member
Join Date: Mar 2012
Location: Maryland
Posts: 1,187
|
Quote:
Originally Posted by skagitstan

I fnally picked up (with difficulty...I'd like to claim one under each arm, but that would be a slight exaggeration) a couple of 4D size AGM batteries. (about 200AH each). They weigh about 125lb each. The battery tray is quite a bit bigger than them, and is rated to support 400 pounds.
I made up some spacers to keep the batteries from sliding around, and strapped them in. ...... They are held in place by 1/4" bolts and nylocks.
|
Nice project - thanks for sharing all the details. What drove your decision to use those two large 4D batteries rather than four smaller 6 volt batteries to get the same capacity? Those 6 volt batteries would be 60-65 pounds each, a more manageable weight.
- - Mike
__________________
2024 Airstream Interstate 19
|
|
|
|
|
10-03-2015, 04:11 PM
|
#75
|
|
Platinum Member
Join Date: Jun 2015
Location: Pennsylvania
Posts: 691
|
Quote:
Originally Posted by skagitstan
......We are almost exclusively using VHB tape as our adhesive.
|
3M makes several grades/types of VHB tape; which are you using?
__________________
BobB
'99 VW EVC
|
|
|
|
|
10-03-2015, 04:21 PM
|
#76
|
|
Platinum Member
Join Date: Dec 2014
Location: East of world famous Sedro Woolley, west of Concrete
Posts: 210
|
Quote:
Originally Posted by BobB
3M makes several grades/types of VHB tape; which are you using?
|
we're using 5952
__________________
Turning a 2015 Ford Transit into a camper. Her name is Annie.
You can watch it all happen here:
https://anniebuild.blogspot.com/
Now, with trip reports!!!!
|
|
|
|
|
10-03-2015, 04:45 PM
|
#77
|
|
Platinum Member
Join Date: Dec 2014
Location: East of world famous Sedro Woolley, west of Concrete
Posts: 210
|
Quote:
Originally Posted by Boxster1971
Nice project - thanks for sharing all the details. What drove your decision to use those two large 4D batteries rather than four smaller 6 volt batteries to get the same capacity? Those 6 volt batteries would be 60-65 pounds each, a more manageable weight.
- - Mike
|
No major reason. 6 volt units would work fine. I decided that the 12V units had a few minor advantages:
Slightly less wiring complexity since the external connectivity is strictly parallel, not series/parallel.
Fewer connections between batteries means fewer connections to fail or corrode.
Fewer units to brace against movement.
Overall weight and size of two mounted 12V units is probably a bit less than four 6V batteries. This gives me a bit more room in the tray for things like the catastrophe fuses and current shunt.
Price would end up about the same, and since the batteries will hopefully last a few years without needing to be moved, the individual battery weight isn't a biggie.
Stan
__________________
Turning a 2015 Ford Transit into a camper. Her name is Annie.
You can watch it all happen here:
https://anniebuild.blogspot.com/
Now, with trip reports!!!!
|
|
|
|
|
10-10-2015, 09:40 PM
|
#78
|
|
Platinum Member
Join Date: Dec 2014
Location: East of world famous Sedro Woolley, west of Concrete
Posts: 210
|
Power Pointing, part one
Before we start the wall insulation and finish up the ceiling insulation and bead board, I want to get the electrics installed. Mainly because it is easier to snake and run lines without all the insulation getting in the way. I decided to start with the charging system, then add all the distributed power points.
The charging system consists of an AC inverter/charger, a solar controller, and a house/car battery interface. (Not to mention the batteries and solar panels that are already installed.)
In this chapter, we'll get the inverter/charger and solar controller hooked up.
The AC system will charge the batteries from an external shore source, or use the batteries to provide AC for things like a microwave or electric toothbrush. The idea is to avoid needing a generator.
If we want to plug in shore AC, we need a plug. And that means a hole.
Now that we find we have a have a hole, we need to plug the hole with our plug. Otherwise, air, and nighttime darkness might leak in.
I'm using a 30Amp bulkhead plug. It has no darkness leakage specification, but it is theoretically waterproof.
It comes with a rubber grommet, but since Annie's wall is slightly curved, I also added some caulk strip.
The plug is a nice shiny white. The aesthetics committee convened an emergency session, and concluded that the plug must match Annie's skin color. So we painted it.

Stan
__________________
Turning a 2015 Ford Transit into a camper. Her name is Annie.
You can watch it all happen here:
https://anniebuild.blogspot.com/
Now, with trip reports!!!!
|
|
|
|
|
10-10-2015, 09:41 PM
|
#79
|
|
Platinum Member
Join Date: Dec 2014
Location: East of world famous Sedro Woolley, west of Concrete
Posts: 210
|
The AC wiring will be made up of 12 gauge exterior grade extension cord. This gives us a stranded, flexible cable with a strong abrasion resistant outside sheath. The hole edges are also painted, and the plug is caulked from the inside as well.
I also made a 30A->20A adapter plug using the male end of the extension cord.
Next I mounted and wired up the solar controller. I probably don't need my scrawled reminder any more.
__________________
Turning a 2015 Ford Transit into a camper. Her name is Annie.
You can watch it all happen here:
https://anniebuild.blogspot.com/
Now, with trip reports!!!!
|
|
|
|
|
10-10-2015, 09:42 PM
|
#80
|
|
Platinum Member
Join Date: Dec 2014
Location: East of world famous Sedro Woolley, west of Concrete
Posts: 210
|
Then the catastrophe fuse, the current monitor shunt, and the battery temperature sensor. These are all on the batteries or the battery tray.
The next step is mounting the MS2012 inverter/charger. It goes on a wood panel that's mounted to the floor in a similar manner to the battery slide. The MS2012 gets bolted to that wood panel with 1/4-20 bolts and t-nuts.
__________________
Turning a 2015 Ford Transit into a camper. Her name is Annie.
You can watch it all happen here:
https://anniebuild.blogspot.com/
Now, with trip reports!!!!
|
|
|
|
|
|
 Posting Rules
|
You may not post new threads
You may not post replies
You may not post attachments
You may not edit your posts
HTML code is Off
|
|
|
|
 » Recent Threads
 |
|
|
|
|
|
|
|
|
|
|
|
|
|
|
|
|
|
|
|
|
|
|
|
|
|
|
|
|
|
|
|
|
|


 Linear Mode

