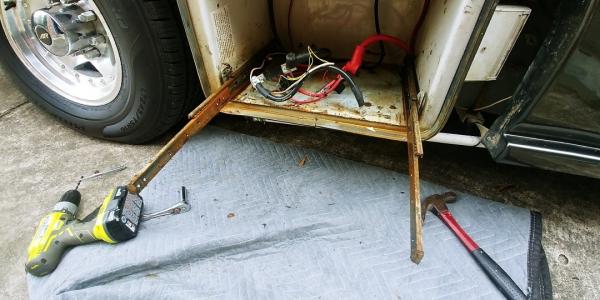
We were lucky to buy this van in great shape - except for the battery tray. I saw it prior to purchase so I knew it was going to need replacement. Here's what I did...
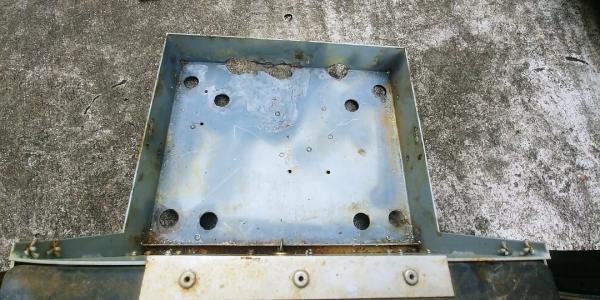
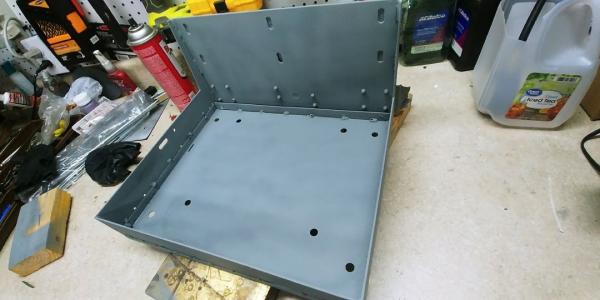
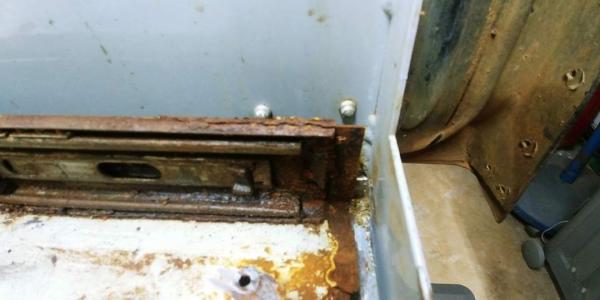
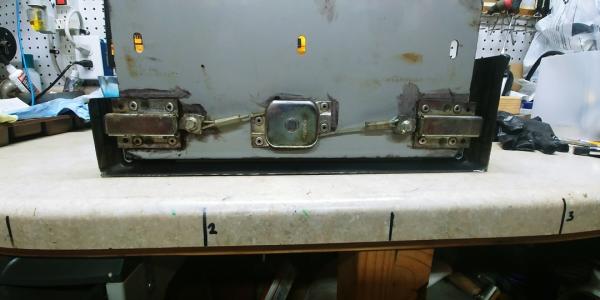
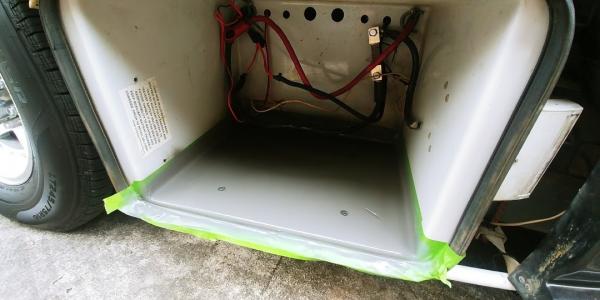
Original was a rusty crusty mess, slides didn't slide.
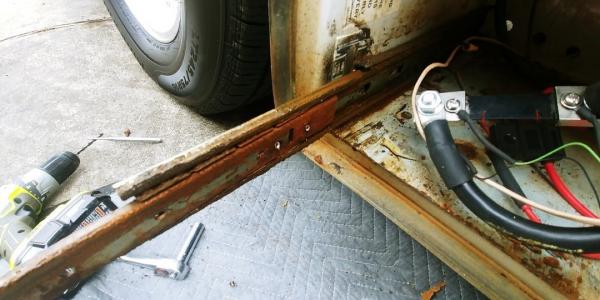
The tray assembly is in 2 parts - the base which is attached through the fiberglass compartment...
...and the sliding tray that the 2 batteries sit into.
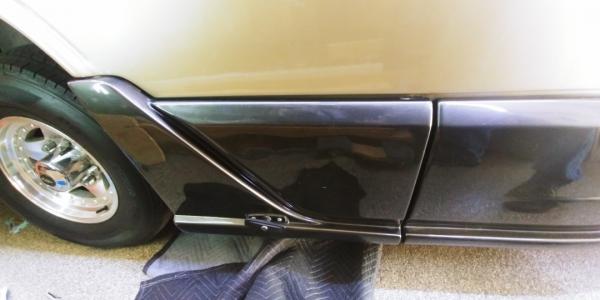
Actually its 3 parts if you also count the exterior face panel. So whatever you do, that panel must align properly with the body and the adjacent panel.
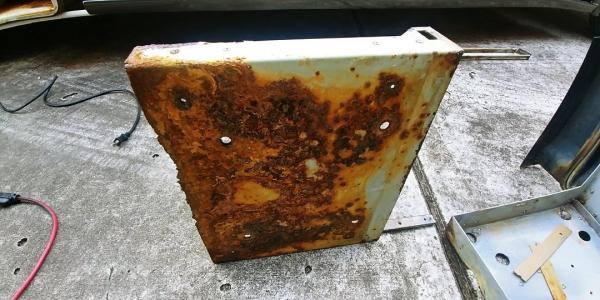
As you can see the base and sliding tray needed help. I first considered the 2 primary factors to be addressed - weight and corrosion. The batteries are pretty heavy, I think about 60 lbs each so there's approx. 120 lbs suspended between the 2 slides. That's the static weight, think about the additional dynamic load as this weight is bouncing down the road as the van travels down the road.
First was repair of the sliding tray. It had some holes, but all in all I didn't see the need to replace the entire tray. It was more solid than it looked. So I wirebrushed the tray and applied rust preventative, then weld-thru primer.
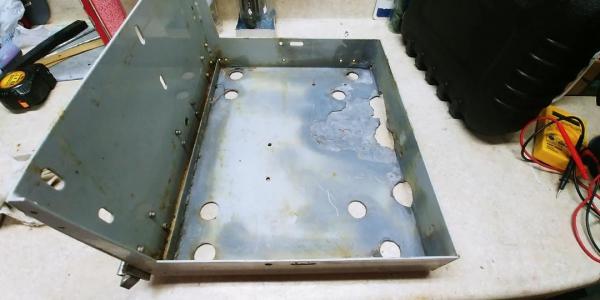
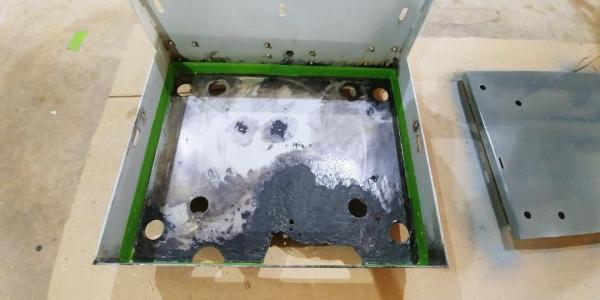
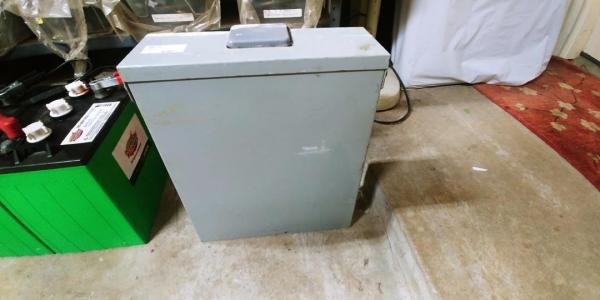
We got to a lot of resale shops and I'm always picking up "maybe I can use this someday" stuff. I had an electrical panel that I got for a few bucks for the breaker and the metal. As luck would have it, the door of the panel was a perfect fit to weld into the bottom of the sliding tray, right over the existing bottom. Heavy gauge steel. So far so good.
Tray was coated with truck bedliner, seemed to hold up ok with other battery tray applications I've used it for in cars.
I also welded a small angle across the back of the tray to act as a stiffener.
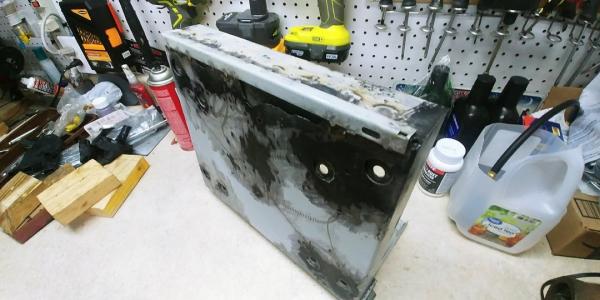
The bottom tray seemed to be too far gone, pretty much not worth keeping except for dimensions needed. I know in the pics it looks about the same as the sliding tray, but it was paper thin at the bottom and remember this needs to hold the battery tray in place.
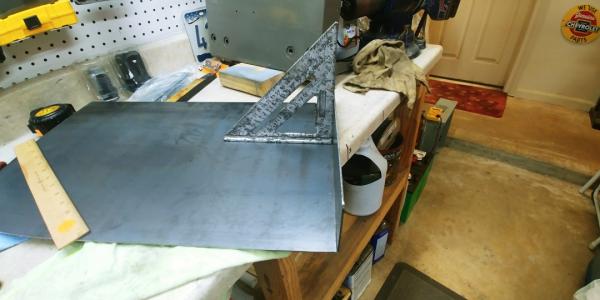
The fiberglass compartment is slightly tapered towards the rear, the battery tray assemble is a tight fit, so my goal was to duplicate exact dimensions of anything I made as a replacement. I used 14 ga steel for the new base.
Meant to mention that most of the original assembly is riveted - I used SS bolts with locknuts to reinstall stuff.
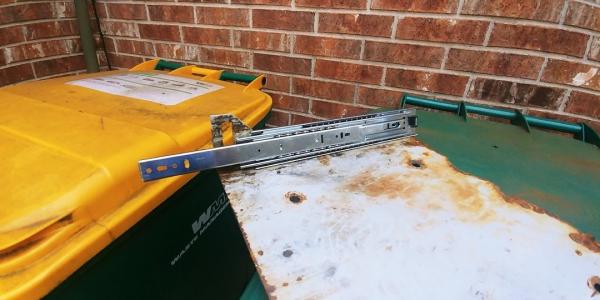
These are the replacement slides I used - Knape & Vogt 8600B 12" full extension slides. They have to be 1/2" in thickness to work with the base and the sliding tray. I think they are rated at 150 lbs per pair but I wasn't extremely worried about it - I'll explain why further on.
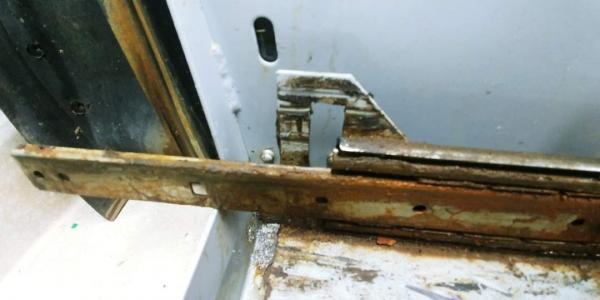
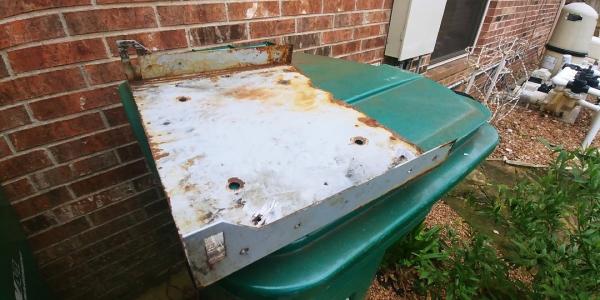
Here's the original base - the replacement base needs to be an exact duplicate. The only wiggle room is that the angle for that drop side doesn't have to be identical.
The new base was also coated with truck bedliner. In this pic I was making sure the drawer latches were fully engaging into the side slots in the base. This is also a good time to clean/lubricate the latch mechanism.
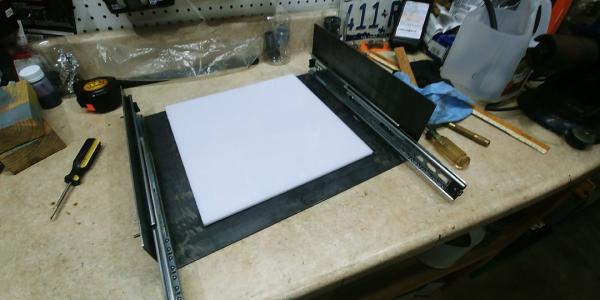
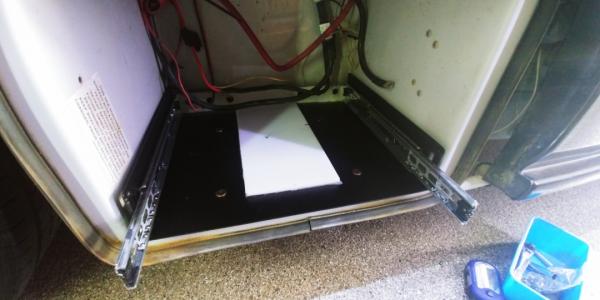
Here's the assembled base with my secret weapon - a 1/4" think sheet of HDPE nylon. It will provide 2 important functions - it will carry most of the weight of the battery tray and yet because it's "slippery", it will allow the heavy tray to be pulled out easily. Now instead of being marginal, the drawer slides only carry a fraction of the overall weight of the batteries.
2 things to note -the nylon sheet still needs to be cut down to allow access to the bottom attachment bolts, and the bolts holding the slides must be cut flush with the nuts so this thing will fit into the compartment.
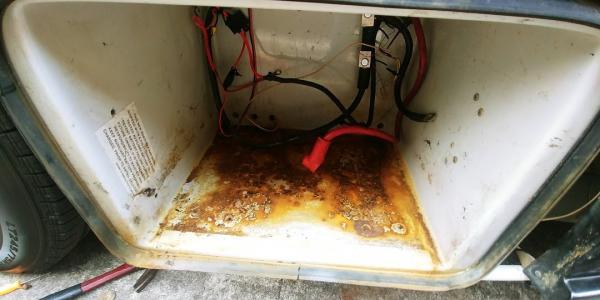
Before installing the new tray assembly, I cleaned up the compartment.
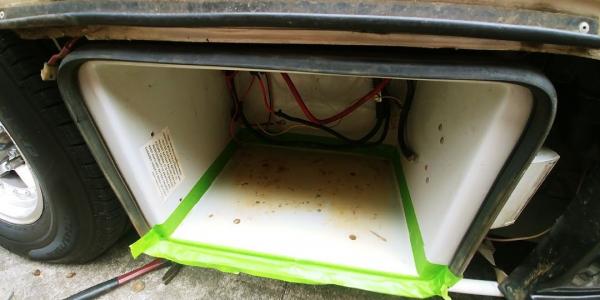
Here's the base installed, ready for the sliding tray. Note that plastic sheet has been trimmed to get to the 4 base bolts. I used brass/bronze flush allen head 5/6" shoulder bolts, long enough to extend through the support framing below the compartment. I chose these to be corrosion resistant and also because the loads on them are very low. They are sometimes called cabinet assembly bolts. The plastic sheet is held in place with GE silicone.
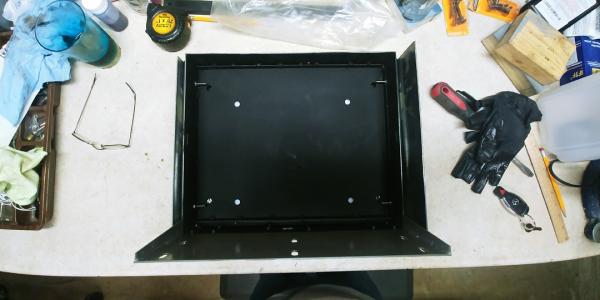
I'll end this with the assembled panel picture. When I removed the rivets holding this panel to the sliding tray, I very slightly enlarged the holes. This allows the panel to be slightly tweaked as needed to ensure alignment with the body and the adjacent panel. Fits great.
I also added a little safety chain to the sliding tray (no pic). One end is attached with a hook to the sliding tray (little hole drilled in the metal side), other end goes through a small hole in the side of the compartment and bolted to a convenient piece of steel. It allows the tray to only slide out a couple of inches, enough that when you first open the tray, you reach in and unhook the little chain, then slide the tray out. Just to ensure that if the latch fails the tray doesn't wind up a foot out from the van.
Operation of the sliding tray is now a breeze, very smooth and everything rides securely.


 Linear Mode


