Journey with Confidence RV GPS App RV Trip Planner RV LIFE Campground Reviews RV Maintenance Take a Speed Test Free 7 Day Trial ×


Reply
 
Thread Tools Display Modes
 
Old 02-15-2022, 11:13 PM   #1
Platinum Member
 
Join Date: Aug 2020
Location: TX
Posts: 179
Default Our Tubby Roadtrek 210 – A Long Post on Suspension Upgrades

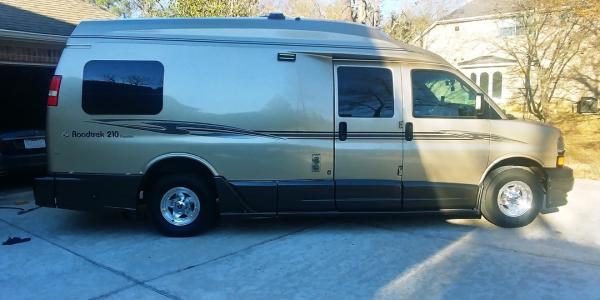
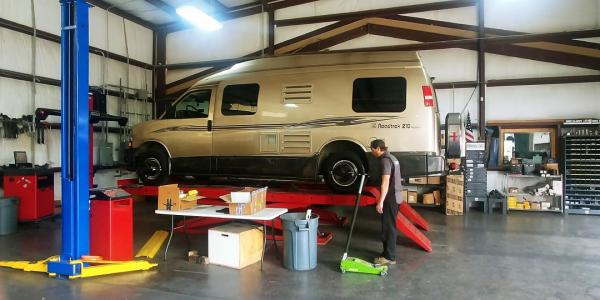
This is about the suspension changes to our 2010 210P on the Express 3500 chassis. Current mileage 76k. Stock AR wheels and stock LT245/75R16 tires. It’s no secret that this era of vans are overloaded. I decided to improve the suspension on ours based on the excellent information in this forum. I’ve spent several weeks going through every related thread I could find since mid-2000’s (Booster, Hondo, Photog, etc.) including related website info, and I’ve compiled quite a few pages of notes. My sincere thanks for the information, hopefully what I post may help someone with a 210. I’ve used information posted from others in this thread - again, my appreciation to the authors.

The lb. weight tag on our van is front 4300 and rear 6084 but I have not weighed it on scales. I suspect that with fuel, water, supplies and a couple of passengers we’re knocking on the 10K door.

I’ve divided the work in the order that it was done for Front and Rear suspension groups.

Front Suspension – First Pass

The suspension RPO (for our van front L/R sides) is 6AL and 7AL. The GM coil spring listed for this RPO is the same as many of the 190’s – part #20760345. OEM GM shocks were installed about 4k miles ago and can still be considered as new shocks. Front steering, bushings etc are in good shape, with some parts replaced recently as maintenance. So I’m not trying to mask poor condition components here.

As posted by others:
OEM Spring
17.7" free height
6+ coils of probably 1.000" wire
Spring rate of about 1488lb/in based on ride height differences to known rate springs
Spring compressed 3.36"
Spring compressed height 14.34"
Baseline Height = 0”

The first thing I did was to install Black (medium duty) SumoSprings jounce bumpers on the front to replace the very tired OEM bumpers.


Ultimate goal is to raise the front about 2” – I agree with Booster’s view that the most efficient height increase is with spring replacement vs. adding spring spacers. Plus as mentioned, you’ve got to remove the spring either way. A 2” lift should not require shock extensions or other mods. The purpose of the SumoSprings is to provide a progressive full-stop of the front suspension, but not for the suspension to rely solely on them. I would like to see only a light bearing of the Sumosprings on the control arm instead of the more crunched look of them with the original coil springs.

One drawback - I stupidly overlooked taking LF and RF ground-to-fender lip measurements as a baseline, and the fender lip and Z-height dimensions now include whatever difference the new SumoSprings have made. As the van sat on its suspension, the Sumosprings were compressed by about half at the inner face and looked somewhat crunched. I’ve noticed a firmer set to the front as you would expect, but with a tendency to porpoise a bit. My guess, remembering the OEM bumpers, was that the new SumoSprings may have raised the front by .5” to 1”.

Current front heights of our van are LF 34.5”, RF 34” and the Z-height 3.5” (with Sumosprings). The info that Booster had given about Z and D factory heights applies to our van as well. Z height = 4.0” to 4.5”, preferred is 4.3”. D height = 5.3” to 6.1”, preferred is 5.7”. I believe (based on my guess) that prior to the Sumosprings installation, heights on our van were LF 33.5” to 34” and RF 33” to 33.5”, perhaps a bit higher than other numbers I’ve seen on the 190’s. But again, based on Booster’s info, the rear overhang, with genset, water tank and bumper spare, could pull up on that front a bit. Also as a guess, I’m thinking that Z-height prior to Sumosprings install may have been 2.5” to 3”. So a 2” lift from new coil springs would get me to the upper range of the Z-height before any spring settling. That seems to be acceptable, and of course an alignment would follow.

Rear Suspension

Our 210 sat fat and happy on the rear overload springs, so my next step was to install air bags. I didn’t expect to pull off of the overloads very much and that’s ok if the goal of supporting the body/frame more and lessening the crash over bumps can be achieved. I still have the option of doing what Booster did, which was removing the overload spring. I held that as last because I wanted to see if the ride could be improved just with airbags.

The part number of our rear OEM springs is 25756366, which seems to be the same as many 190’s. How Roadtrek ignored the 210 additional overhang and weights is beyond me, they could have easily spec’d the van with the heavier 22799639 spring packs.

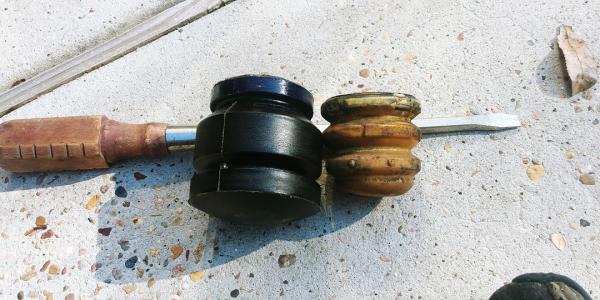
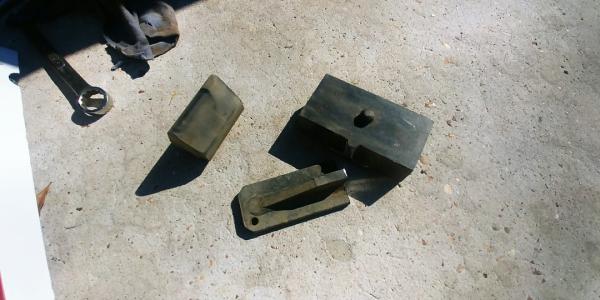
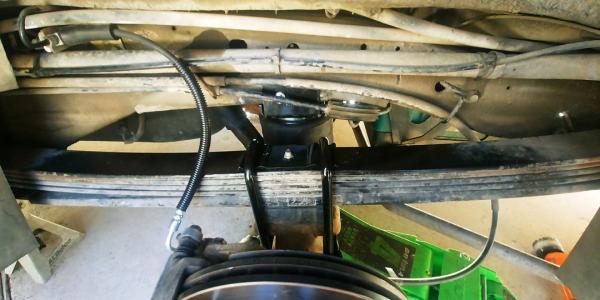
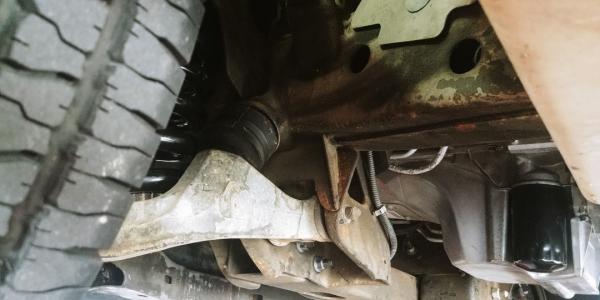
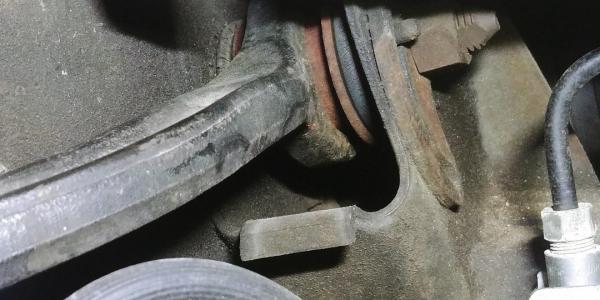
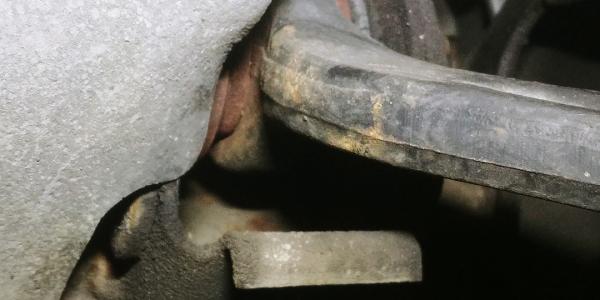
As mentioned by other 210 owners, there is a 1.5” lift block installed that also has an extension for contact with the factory bump-stock. I needed to cut off the extension to provide space for the airbags – as part of this work I thought the best way was to remove the spacer for cutting, and then reinstall it. This also allowed me to replace the rusty crusty original u-bolts. New u-bolts came from Stengel Bros. The leaf springs are 2.5” wide and need 2.5625” inside dimension 5/8 in u-bolts. Length range for a 210 with spring spacer is 10.5” to 11.75” (OEM u-bolts are about 11.75” and a bit long). Incidentally, these long u-bolts take several repeat torques as they s-t-r-e-t-c-h. I did this over the course of several initial days and drives and will re-check until I see that the values stay consistent.


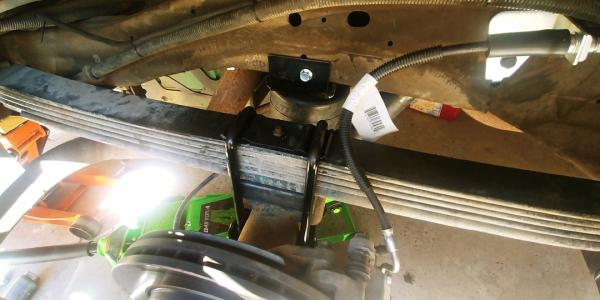
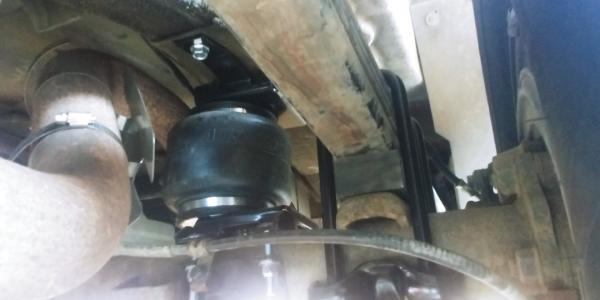
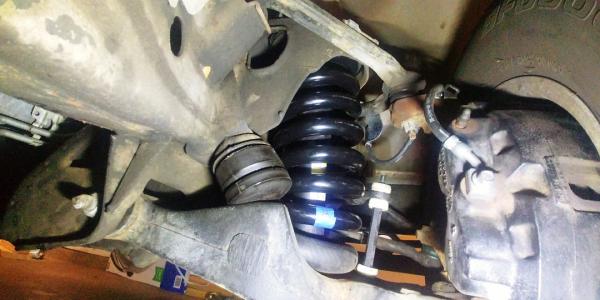
I installed the Air-Lift 88205 kit with internal jounce bumpers after reading of Booster’s experience with them. I like them as they serve several purposes with one installation. I plumbed them as individual units so LR and RR fender heights could be set up as needed, I may install an onboard compressor later on.


The D-height dimension on our van was 4.75” (driver side). LR fender lip height was 34.75” and RR fender lip height was 35”.
With no air, LR fender lip height went to 36.5”, RR fender lip height also went to 36.5”. I believe this may due to the airbag internal jounce bumper combined with airbag/brackets now taking up the space between frame and axle and perhaps evening out that original .25” difference side to side. So as has been noted, if there was a complete loss of air, the van still receives support from the airbags. I think the internal jounce bumper is a great idea.

I then put 25 psi into each airbag and checked the front fender lip heights. Rear fender lip heights went to 37.25”, LF went to 34.125” and RF went to 34.25” Prior to airbags, LF = 34.5”, RF = 34”. I’m not sure why the front number changed in this manner (realizing that raising the rear puts more downforce on the front). Perhaps one factor is the probably weak condition of the front coil springs not giving a consistent result? As you can see, there is a rake rear-to-front, which was expected. If there is a 2” lift in the front I believe the van will sit just fine and of course can be fine tuned with airbag pressure.


The leaf spring pack now sits slightly off the front ends of the overload leaf, which is good.


Driving impressions – based on the info I read, I expected some sort of driving improvement. But I was honestly not prepared for the fairly dramatic change in the suspension characteristics, so I’m subjectively calling this a big improvement in the back. There is still sway at corners, but much less than before the airbags. In particular, the crash of the rear suspension over bumps and bad roads is virtually eliminated, much more pleasant to drive. I suppose that the airbags are taking up the initial impact with air pressure and the internal jounce bumpers, then transferring a much-dissipated force to the leaf springs. I went over the same pre-airbag test route and the difference was very noticeable. I also noticed that the front suspension is working a bit harder, perhaps from the weight transfer and I could feel more of a rebound (porpoising) from the front SumoSprings. So all in all, in my opinion the Air-Lift kit is worth the time and money, wish I had done this a lot sooner. But I also think that a critical factor for overall improvement is to focus on both front and rear suspension in order to reach a balanced suspension operation. At this point the suspension did not have that balanced feel.

Front Suspension – Second Pass

The last part of the work now focused on front coil spring replacement. As stated, the goals were improved weight capability and Z-height increase, resulting in improved driveability. I also used the fender lip height measurements as a comparison.

So now it was on to figuring out which coil springs to use…
Incidentally, here’s a website that list cross-references to coil springs:

Pontotoc Part Number Interchange | Distributor Tools | MW Components

Col. 1 = MW Components (I think), Col. 2 = NAPA, Col 3 = Delco, Col. 4 = Moog

I used this info and the hundreds of forum posts to help verify spring data and to get to my final selection described below. You can find very specific and detailed information in those posts – far too many posts to list here. And as always, results can be very subjective so I’m just giving you my perspective.

I rejected the Tufftruck 1617 and 1618 setdowns as the more recent (2020+) threads indicated that there was more lift from these springs than the “original” 1617’s that Booster has installed into his 190.

Specs as posted on the original 1617’s:
17.7" free length-same as the OEM spring
8 coils of 1.050" wire
2026lb/in spring rate per Photog
Spring compression 2.5"
Spring compressed height 15.2"
Height change at wheelwell 2.0"

The last 1617 info I saw included a free height of 18” to 18.7”. I can’t be sure of the result of these springs, plus I’d rather install a spring without having to substantially compress it.

I rejected the Bill Erb spring as the results seemed to be all over the place.

I rejected the SumoSprings brand coil spring. Other than a description as a diesel engine version I couldn’t find actual specs.

I rejected the SC20470 spring (Moog 81006). I know another poster had installed these and noted a 2” height but the spec data didn’t appear to result in the goals I wanted. I couldn’t see that the wire diameter and free height made sense to result in the 2” height increase, also noted by Booster.

I rejected the Moog 81004, even though my choice would have been the 81004 as it initially gave the 2” height increase in prior years posts. However, later posts indicated an issue with too much height and justifiably wondering why the spring construction had seemingly changed.

My final choice was the Delco 45H0340 (19237856) which on paper is the same cross-reference spring as the 81004. I thought that if anyone would continue to require a standard spec, it would be an OEM mfg. as they would not want surprises at the dealer service installation stage. My rationale was that a supplier would (hopefully) produce a consistent Tier 1 spring for GM (I think it’s actually Eaton spring supplying?). Still a wing and a prayer, I was simply going by what I considered to be less risk. One additional note - the 81004 set is about $260, the Delco springs are $152. Even with shipping (Rockauto), the Delco springs are less than the “same” Moog springs.

Info posted by others:

Interchange part numbers:
Moog 81004
ACDelco 45H0340
Napa 277-3435
Husky SC20468
Raybestos 585-1340

ID: 4.068
Wire Dia: 1.031
Rate/Inch: 1570
Load at rated height: 5934
Rated compressed height: 14
Free length: 17.78

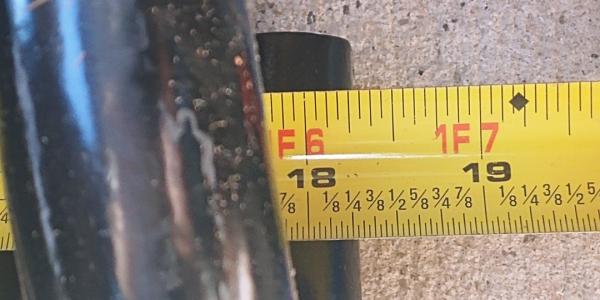
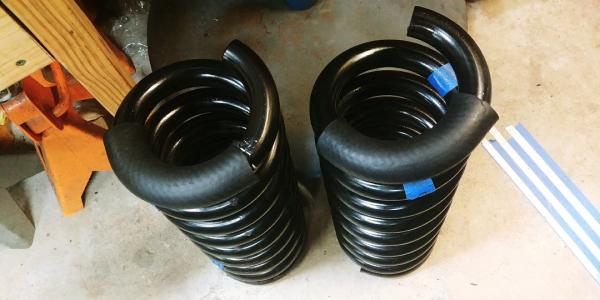
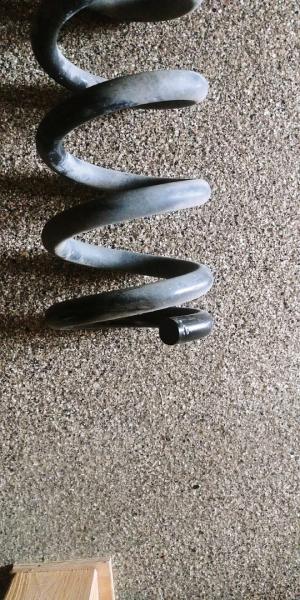
The new 45H0340 coils were delivered in a sealed AC-Delco box with the correct part number on it, made in USA. The springs themselves were not tagged so I could only hope that these were the right springs. But despite all my analysis I still hit a bump in the road – the free height of these new springs was 18.25”, or .5” more than the spec data showed, and higher than the stock 17.7” I was hoping for. Coil diameter was 1.03” and the distance between coils was .85” to 1.00”. Based on the information I’d seen, more coils can equal more lift but a more complacent ride, which would be ok.


So now there was the question about the .5” difference in free height – combined with the number of coils would this increase the lift higher than the goal of 2”? Now what? After some thought I decided to trim a section of the bottom coils to get the free height to 17.75”. This wound up being about a third of a coil, and ended up with 8.5 coil count. Here’s why I decided to trim them:

• Based on recent (2018+) 1617 and 81004 information, there was never an issue with not enough height (2”) but there were comments about too much height (>2”). So even with these Delco springs, if I removed .5” of coil height I was perhaps avoiding excessive ride height increase over 2”.

• The top coil end was turned slightly down to the next coil and would need to remain that way to fit better into the (non-oriented) top coil insulator and frame cup. The lower coil keys into a slot in the lower control arm. After trimming part of the lower coil, the spring could easily just be turned slightly to fit into the lower control arm slot without any issue at the top fit.


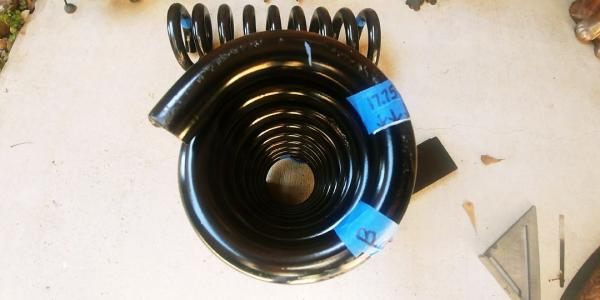
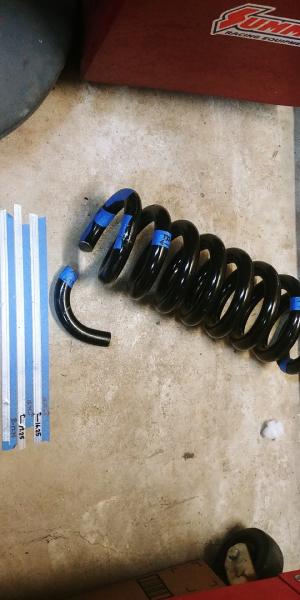
Trimming the spring coils was not a big deal, a few minutes with the cut-off wheel, but I had now moved into the I-hope-this-was-right stage. But at the same time I didn’t see where that small amount of trimming would drastically change anything except shave a bit of height off. I also added a section of 1” ID heater hose as an anti-rattle insulator on the bottom coil.


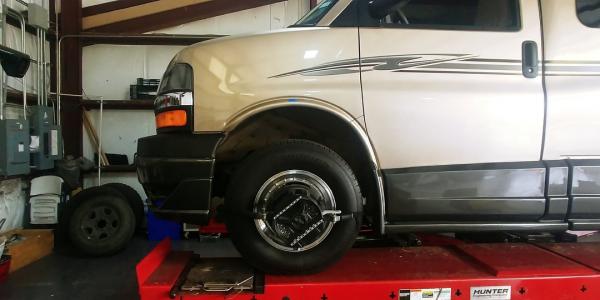
The van was taken to a local off-road shop for the coil spring replacement and alignment. I also took a new set of spring top insulators (Moog K160021) but we decided to re-use the original insulators as they were better construction and looked good. They fit fine onto the new springs.

Incidentally, the OEM springs averaged about 17.5” free height after their 11-year service.

After the new 45H0340 coil springs were installed came the moment of truth when the van was set back down and I breathed a sigh of relief. The following heights were noted:
Fender lip height: LF = 36.5”, RF = 36.5”, an increase of 2” to 2.5” which seemed to be on target.
Z-height changed to 4.8”, an increase of 1.3”. I’m expecting that the new springs may settle slightly, so after a road trip I’ll re-check.

The front Sumosprings are now lightly touching the control arm instead of looking like they are smashed into it – I think this is where they need to be to provide a more progressive response?


The rear bags were then adjusted (each side a little different) to bring the rear fender lip heights to 37” which gives a visual slight .5” rake. That’s a bit misleading though, as the vehicle frame itself was level as measured from the alignment hoist. Toe and camber only needed a slight adjustment, and all alignment specs were almost in the center of the specification ranges. I will also recheck the alignment again in later miles. We did a test drive with the tech, did a final adjustment on steering center, and I was then on my way.


Overall Drive Impressions

I really do have to say the driving difference is night and day, to use a very overworked expression. But it’s true. Of course, this thing will never drive like a car but it feels like it finally has a working suspension system instead of crashing through bumps. Front tires 65 psi and rear tires 80 psi. Small bumps are felt but not especially harsh, maybe it’s the new shocks. I anticipate a later final step of Bilsteins all the way around as the currently installed GM shocks wear out. The installation shop felt that the rebound factor of the shocks may be their biggest weakness and recommended the Bilsteins which have also been mentioned in this forum many times.

There is no further porpoising, or pitching front to back over larger bumps. There is a bit of spring from the back I guess as the airbags compress/decompress, but it’s very small. It may also be the suspension slightly overpowering the rebound rate of the stock shocks. I wondered if the new coils would be too bouncy but they returned to static condition right away –again back to the shocks, I can see this happening as the shocks wear. Sway is much reduced and after a recent road trip in the Ft. Davis mountains (roads and wind), this is a big deal to me. So, in general the van feels more stable, absorbs bumps better and provides a much safer controllable feel. And there is adjustability with the rear air bags to compensate for different loading. At this time I don’t think I need to remove the overload leafs.

I was hesitant to modify the coils but I’m glad I did. With the trimming to free height spec of 17.75”, the amount removed was minor and after driving the van, I can’t really see a downside unless you went crazy with it or monkeyed with variable rate springs (these coils are constant rate). The key goal of increasing ride height was achieved and the ride quality is vastly improved over the original coils.

I would recommend these 210 modifications without hesitation for a much safer and enjoyable ride. Thank you again to this forum for the remarkable volume of information that enabled me to successfully complete this work.
TX-Trek is offline   Reply With Quote
Old 02-16-2022, 01:12 AM   #2
Platinum Member
 
rowiebowie's Avatar
 
Join Date: Jul 2018
Location: Texas
Posts: 2,632
Default

Congrats on the positive results and great documentation.

You did your homework too, as I recongnized your quotes from older "lift" posts.
rowiebowie is offline   Reply With Quote
Old 02-16-2022, 01:42 AM   #3
Platinum Member
 
Join Date: Aug 2010
Location: Minnesota
Posts: 11,991
Default

Great writeup, thank you for that. Good to see some more recent data and a front coil that actually worked right. You probably will see 1/4-1/2" of breakin on the spring, but likely on the low side because you used the precompressed top isolator. On a 210 you probably started at about 34+" on the front lips, most 190s start at about 33.5-34 I think.


In the front, you may want to consider putting the stock bump stops back on as you probably don't need more rate any more because you have higher rate springs. Getting a little more travel without getting stiffer might make the ride smoother and porpoising less. Was the diameter 1.03" on the spring wire. More coils in the same length spring with all other things equal will give a slightly softer ride that is less progressive most of the time, which is desirable to me. Shortening the springs is no big deal, but for a Chevy I might have done it differently. It would be a bit more work though unless you have a big belt sander. The coils are about an inch diameter and the ends may or may not be turned down toward the center of the spring a bit so they lay a bit flatter. The upper mount in the Chevy is actually flat so having the top flatter is actually and advantage, I think. Just grinding the end down the 1/2 inch or so you needed would have been the other way to do it and improve the top seat a bit. The way you did it will probably not be and issu, but might push through the isolater easier. Even if it does push through you probably would not ever notice anything different in ride or noise.


Porpoising is when the springrate is overpower the shock damping rate, so to get rid of it you might want shocks with a higher damping rate, or variable rate ones. We run similar springs with factory bump stops and similar height and Bilsteins control ours very well. I would expect the variable Fox or Konis to be just as good or better, also.


The minor pitch you feel of the rear is probably when it hits and comes back of the overload leaf, as we had pretty much the same thing, along with some noise. We have a bit less rear weight than you do and run with 35-45psi in the bags.If we are getting on the internal bump stops in the bags we can't feel it. We get longer, smoother motion in the rear that way and with no overload, no pitching. Bilsteins in the back also which seem to match even the lower spring rate now on air and no overload just fine. You might want to go a bit higher in the back to get further off the overload to see if the pitch reduces some. Running about 1" higher in the rear seems to work well on the Chevies, gives a bit more clearance also.


Essentially all the Chevies sit higher on the right rear than the left, probably because of more weight on the left side. Most will take 10+psi more in the left bag than the right bag to level out. Getting the rear level will probably make the front more level also. We solve our mismatch of air pressures requirement when I removed the overload leafs. On the right side I removed it completely but on the left I took it out and then cut off both ends, leaving just the center where it mounts. I used it back where it was as a spacer to lift the left side up even. We now can run the same pressures in both sides and be level.
booster is online now   Reply With Quote
Old 02-16-2022, 02:32 PM   #4
Platinum Member
 
Join Date: Aug 2020
Location: TX
Posts: 179
Default

Quote:
Originally Posted by booster View Post
Great writeup, thank you for that. Good to see some more recent data and a front coil that actually worked right. You probably will see 1/4-1/2" of breakin on the spring, but likely on the low side because you used the precompressed top isolator. On a 210 you probably started at about 34+" on the front lips, most 190s start at about 33.5-34 I think.

In the front, you may want to consider putting the stock bump stops back on as you probably don't need more rate any more because you have higher rate springs. Getting a little more travel without getting stiffer might make the ride smoother and porpoising less. Was the diameter 1.03" on the spring wire. More coils in the same length spring with all other things equal will give a slightly softer ride that is less progressive most of the time, which is desirable to me. Shortening the springs is no big deal, but for a Chevy I might have done it differently. It would be a bit more work though unless you have a big belt sander. The coils are about an inch diameter and the ends may or may not be turned down toward the center of the spring a bit so they lay a bit flatter. The upper mount in the Chevy is actually flat so having the top flatter is actually and advantage, I think. Just grinding the end down the 1/2 inch or so you needed would have been the other way to do it and improve the top seat a bit. The way you did it will probably not be and issu, but might push through the isolater easier. Even if it does push through you probably would not ever notice anything different in ride or noise.

Porpoising is when the springrate is overpower the shock damping rate, so to get rid of it you might want shocks with a higher damping rate, or variable rate ones. We run similar springs with factory bump stops and similar height and Bilsteins control ours very well. I would expect the variable Fox or Konis to be just as good or better, also.

The minor pitch you feel of the rear is probably when it hits and comes back of the overload leaf, as we had pretty much the same thing, along with some noise. We have a bit less rear weight than you do and run with 35-45psi in the bags.If we are getting on the internal bump stops in the bags we can't feel it. We get longer, smoother motion in the rear that way and with no overload, no pitching. Bilsteins in the back also which seem to match even the lower spring rate now on air and no overload just fine. You might want to go a bit higher in the back to get further off the overload to see if the pitch reduces some. Running about 1" higher in the rear seems to work well on the Chevies, gives a bit more clearance also.

Essentially all the Chevies sit higher on the right rear than the left, probably because of more weight on the left side. Most will take 10+psi more in the left bag than the right bag to level out. Getting the rear level will probably make the front more level also. We solve our mismatch of air pressures requirement when I removed the overload leafs. On the right side I removed it completely but on the left I took it out and then cut off both ends, leaving just the center where it mounts. I used it back where it was as a spacer to lift the left side up even. We now can run the same pressures in both sides and be level.
Happy to hopefully add to the suspension database here. I think you're right on the initial lip height, from what I read on the 190's I think the 34-ish number makes sense. I'm now in the finding-the-sweet-spot stage with any further mods and/or changes. The nice thing is that even if I did nothing, the improvement is great.

I did first consider taking a slice out of the top coil similar to placing it on a grinder, but (I'll get a pic of it) the top of the OEM spring was the same as the new spring. By this I mean that the top of the spring was not completely flat, but the top coil was pulled in closer to the next coil so one end could indeed be considered as the top. So I left that alone and just trimmed up the lower coil. I agree that if you have a flat pocket, the top of the spring should be flat. But in this case I replaced the stock configuration with the same. I also noticed that the isolator (maybe just from use) did have an index so to speak where the end of the spring sat, so we did the same for the new spring. The factory isolator was a combo steel/rubber unit as opposed to the all-rubber and skinnier arrangement of the Moog isolator. So in that regard I feel that the top of the oem spring was essentially duplicated with the new spring. The "lowered" top coil was the same on both the original and new springs.
I may try the isolator swap but perhaps I could first test with different air pressure in the rear bags? Right now it's all new and I'm working on getting the small nuances right.

The shop was outstanding, highly recommend to anyone in the Houston area. Without an upsell, they did indeed tell me first about the Bilsteins and also the Fox. They had a set of Fox and they were pretty impressive. Just as reference, the Bilsteins ran about $100 each and the Konis $190. But it's all relative when you want a controllable vehicle

In regards to the rear, yes, I need to test a few different air pressure settings to see what the results may be. I think that with a change of shocks in the back, such as Bilsteins, combined with the "right" air pressure may fine tune the rebound, etc. I was reluctant to remove the 1.5" spacer as I thought then there is too much dependent on the air bags to maintain proper height, it could all be too bouncy, and even with the internal jounce bumpers an airbag failure could really put a corner way down.

You are also exactly right on the left rear needing more air pressure. I remembered reading on your post about rear overload removal but using a spacer on the LR. We leveled out the van at the shop before we aligned and test drove and the LR did indeed take slightly more psi. My initial readings of the fender heights also showed a lower LR corner. Van readings were taken with 3/4 fuel tank and 1/2 rear water tank.

I think that as these vehicles age, aside from basic maintenance of course, the suspension is an area that can produce significant results in vehicles that essentially came overloaded from the factory.

Edit, here's the top of the original oem spring, virtually a copy of the new spring.


TX-Trek is offline   Reply With Quote
Old 02-16-2022, 03:07 PM   #5
Platinum Member
 
Join Date: Aug 2010
Location: Minnesota
Posts: 11,991
Default

Quote:
Originally Posted by TX-Trek View Post
Happy to hopefully add to the suspension database here. I think you're right on the initial lip height, from what I read on the 190's I think the 34-ish number makes sense. I'm now in the finding-the-sweet-spot stage with any further mods and/or changes. The nice thing is that even if I did nothing, the improvement is great.

I did first consider taking a slice out of the top coil similar to placing it on a grinder, but (I'll get a pic of it) the top of the OEM spring was the same as the new spring. By this I mean that the top of the spring was not completely flat, but the top coil was pulled in closer to the next coil so one end could indeed be considered as the top. So I left that alone and just trimmed up the lower coil. I agree that if you have a flat pocket, the top of the spring should be flat. But in this case I replaced the stock configuration with the same. I also noticed that the isolator (maybe just from use) did have an index so to speak where the end of the spring sat, so we did the same for the new spring. The factory isolator was a combo steel/rubber unit as opposed to the all-rubber and skinnier arrangement of the Moog isolator. So in that regard I feel that the top of the oem spring was essentially duplicated with the new spring. The "lowered" top coil was the same on both the original and new springs.
I may try the isolator swap but perhaps I could first test with different air pressure in the rear bags? Right now it's all new and I'm working on getting the small nuances right.

The shop was outstanding, highly recommend to anyone in the Houston area. Without an upsell, they did indeed tell me first about the Bilsteins and also the Fox. They had a set of Fox and they were pretty impressive. Just as reference, the Bilsteins ran about $100 each and the Konis $190. But it's all relative when you want a controllable vehicle

In regards to the rear, yes, I need to test a few different air pressure settings to see what the results may be. I think that with a change of shocks in the back, such as Bilsteins, combined with the "right" air pressure may fine tune the rebound, etc. I was reluctant to remove the 1.5" spacer as I thought then there is too much dependent on the air bags to maintain proper height, it could all be too bouncy, and even with the internal jounce bumpers an airbag failure could really put a corner way down.

You are also exactly right on the left rear needing more air pressure. I remembered reading on your post about rear overload removal but using a spacer on the LR. We leveled out the van at the shop before we aligned and test drove and the LR did indeed take slightly more psi. My initial readings of the fender heights also showed a lower LR corner. Van readings were taken with 3/4 fuel tank and 1/2 rear water tank.

I think that as these vehicles age, aside from basic maintenance of course, the suspension is an area that can produce significant results in vehicles that essentially came overloaded from the factory.

Sounds like you have it under control.


One thing to think about is that the spacer in the rear that you have is on top of the axle, under the spring so removing it will just have the body sitting lower. Nothing will change in the springing at all. The advantage, as long as you don't get too low with the body, would be it would allow you to use the bags to get the overload further away from the rest of the springs, if you find it is still hitting an pitching a bit. One of my first tests was to have the overloads bent down about 1/4" on each end it did make a noticeable difference. I think you would need probably over 1/2" gap to the overload to hardly ever hit.


Do you happen to have a printout of where the alignment settings wound up? That is always great to see and have for reference.
booster is online now   Reply With Quote
Old 02-16-2022, 05:09 PM   #6
Platinum Member
 
Join Date: Aug 2020
Location: TX
Posts: 179
Default

Another oversight, I forgot to get a printout. But I sent a note to the shop to see if the machine retained the data; if so I asked for a copy.

What did strike me was that almost all the readings were virtually centered within the range criteria. All green. Readings were shown as an inner very tight range and a slightly broader overall range if I've described it right. L/R camber was at the positive end of the inner tighter range. His comment was that with whatever slight settling the camber would move further into that inner range. I took it to be that the positive camber would move negative direction with any settlement of the suspension. Not meaning it would end up negative, just describing the direction.

It tracks very well with no pull so I think the settings are on target but I hate to not have gotten a copy.

One other comment, in a previous post you had suggested 65 psi in the front. I had the fronts at 60 psi - I increased the pressure to 65 and it made a substantial difference in the overall handling. I didn't think 5 psi would have that impact but it did. Combined with 80 psi in the back I think thats a good pressure range for this vehicle. These are "hot" pressures after a few miles of driving.

Edit I also wanted to mention that I do want to get a rear swaybar, very interested in the torsion bar setup you did. I know about the roadmaster and hellwig (with genset relocation). Just out of my curiosity I'm going to make a dimensional sketch of the back end and head for my local pickapart yard. I want to see if there's a rear swaybar out of something that may fit, realizing that I may have to fab endlinks. But it would be nice to find a bar that could attach to the axle shock brackets and have the right arm dimensions and angle. Maybe wishful thinking but you never know.
TX-Trek is offline   Reply With Quote
Old 02-16-2022, 05:52 PM   #7
Platinum Member
 
Join Date: Aug 2010
Location: Minnesota
Posts: 11,991
Default

Quote:
Originally Posted by TX-Trek View Post
Another oversight, I forgot to get a printout. But I sent a note to the shop to see if the machine retained the data; if so I asked for a copy.

What did strike me was that almost all the readings were virtually centered within the range criteria. All green. Readings were shown as an inner very tight range and a slightly broader overall range if I've described it right. L/R camber was at the positive end of the inner tighter range. His comment was that with whatever slight settling the camber would move further into that inner range. I took it to be that the positive camber would move negative direction with any settlement of the suspension. Not meaning it would end up negative, just describing the direction.

It tracks very well with no pull so I think the settings are on target but I hate to not have gotten a copy.

One other comment, in a previous post you had suggested 65 psi in the front. I had the fronts at 60 psi - I increased the pressure to 65 and it made a substantial difference in the overall handling. I didn't think 5 psi would have that impact but it did. Combined with 80 psi in the back I think thats a good pressure range for this vehicle. These are "hot" pressures after a few miles of driving.

Edit I also wanted to mention that I do want to get a rear swaybar, very interested in the torsion bar setup you did. I know about the roadmaster and hellwig (with genset relocation). Just out of my curiosity I'm going to make a dimensional sketch of the back end and head for my local pickapart yard. I want to see if there's a rear swaybar out of something that may fit, realizing that I may have to fab endlinks. But it would be nice to find a bar that could attach to the axle shock brackets and have the right arm dimensions and angle. Maybe wishful thinking but you never know.

Interesting that you alignment guy thought it would go more to the negative when settling. The old school rear drive cars and trucks, like the Chevies still are, are normally camber progressive to the positive side on compression so moving it up should have already moved negative compared to where it was if I am thinking straight. You can tell pretty easily on most vehicles which way it will go by looking at the upper control arm angle compared to horizontal. It it slopes down away from the frame pivots the vehicle should go positive as the suspension compresses until the upper arm goes above horizontal and starts moving more to the negative side. Almost all new vehicles are negative progressive on compression and lots of techs don't realize not all vehicles are sometimes. Both our van and my 1996 Buick Roadmaster that has similar suspension checked positive progression, but I have since modified the Buick to be negative progression by putting on taller upper balljoints to move the control arm angle above horizontal. Spec on camber for the van is positive for alignment at resting position.


Interesting that the tire pressure did that much good, but if you 60 psi was a hot tire pressure that might explain it because you would be lower than that cold and under 60 psi cold pressure the handling deteriorates faster. It would also mean that if you have 80 cold in the rear you might be underinflated if running heavy in back. All tire pressures are normally given as cold temps by the manufacturers, and by most everyone here so you are actually lower than most if done hot.


It will be interesting to see if you find anything in the used swaybar try. It would need to be a big bar of 1 3/8" to 1 1/2" diameter with about 15-17 inch long arms. If a straight section lines up with the pads on the back side of the axle tubes, that is the official factory mounting place for a swaybar when one is used with those axles. I would worry about the shock mount not being quite strong enough, I think. If you ran across the pix of our straight bar install, it is mounted to those pads and on the pix of the original install it was the 9.75" Dana 60s, normal semi floating axle which most Roadtreks have. Later pix would show it on the optional 10.5" optional full floating axle that I changed to later but the bar mounts in the same place.
booster is online now   Reply With Quote
Old 02-16-2022, 06:19 PM   #8
Platinum Member
 
Join Date: Aug 2020
Location: TX
Posts: 179
Default

Quote:
Originally Posted by booster View Post
Interesting that you alignment guy thought it would go more to the negative when settling. The old school rear drive cars and trucks, like the Chevies still are, are normally camber progressive to the positive side on compression so moving it up should have already moved negative compared to where it was if I am thinking straight. You can tell pretty easily on most vehicles which way it will go by looking at the upper control arm angle compared to horizontal. It it slopes down away from the frame pivots the vehicle should go positive as the suspension compresses until the upper arm goes above horizontal and starts moving more to the negative side. Almost all new vehicles are negative progressive on compression and lots of techs don't realize not all vehicles are sometimes. Both our van and my 1996 Buick Roadmaster that has similar suspension checked positive progression, but I have since modified the Buick to be negative progression by putting on taller upper balljoints to move the control arm angle above horizontal. Spec on camber for the van is positive for alignment at resting position.
I think you're right and I had it backwards

Quote:
Originally Posted by booster View Post
Interesting that the tire pressure did that much good, but if you 60 psi was a hot tire pressure that might explain it because you would be lower than that cold and under 60 psi cold pressure the handling deteriorates faster. It would also mean that if you have 80 cold in the rear you might be underinflated if running heavy in back. All tire pressures are normally given as cold temps by the manufacturers, and by most everyone here so you are actually lower than most if done hot.
I didn't realize the cold pressure rating. I look at the van TPMS monitor from time to time as I drive and have let air out if I see hot pressure climbing. Example is I had set the rear cold pressure at 80, but then saw hot tire pressure had climbed to 88-89 so I let air out to 80 psi. Same process on the fronts. So you're saying that I'm ok to go with cold psi at 65/80 with the knowledge that it's ok for the hot pressure to increase? Would there be a safe pressure increase limit? Very enlightening, thanks.

On the rear bar, that's good info - I will look at the axle mounting arrangement in the wrecking yard and see if there is a more robust mounting method. I could re-weld and strengthen the shock mounts but would prefer to avoid having to do that lol.
TX-Trek is offline   Reply With Quote
Old 02-16-2022, 07:02 PM   #9
Platinum Member
 
Join Date: Aug 2010
Location: Minnesota
Posts: 11,991
Default

Quote:
Originally Posted by TX-Trek View Post
I think you're right and I had it backwards


I didn't realize the cold pressure rating. I look at the van TPMS monitor from time to time as I drive and have let air out if I see hot pressure climbing. Example is I had set the rear cold pressure at 80, but then saw hot tire pressure had climbed to 88-89 so I let air out to 80 psi. Same process on the fronts. So you're saying that I'm ok to go with cold psi at 65/80 with the knowledge that it's ok for the hot pressure to increase? Would there be a safe pressure increase limit? Very enlightening, thanks.

On the rear bar, that's good info - I will look at the axle mounting arrangement in the wrecking yard and see if there is a more robust mounting method. I could re-weld and strengthen the shock mounts but would prefer to avoid having to do that lol.

The tire pressure gain is expected and designed in to be OK as it is the only real practical way to do it. Letting air out is easy, but putting it back in is much harder and nobody would be able to keep up with it.


Tire pressure increase is a very good way to judge tire temps, though, and probably better than most TPMS setups, especially the ones with sensors in the caps. In the back you will see just under a 2 psi increase in pressure for each 10*F over ambient temp, so if you start seeing 15+pressure increases you probably are running pretty hot on the tires on an also hot day. 210s are pretty hard an rear tires and we have heard of a number of expensive damage to fiberglass blowouts in the rear so good to keep the tire pressure good all the time.


If you can weld and do a bit of fabrication you could make mounts to go on the pads like I did out of pieces of steel flat stock. Not horrible job, but putzy to get everything in place. That way would work for whatever bar you might find in the junk yard or if you went with the straight bar like we did.
booster is online now   Reply With Quote
Old 02-16-2022, 07:55 PM   #10
Platinum Member
 
Join Date: Aug 2020
Location: TX
Posts: 179
Default

Great info thank you.

Yes I remember seeing info about the 210s being hard on rear tires and I agree. I got concerned when the rear pressures hit almost 90 psi after driving awhile in warm temps and hot roads. I figured the tire temps were very high. I've got an IR gauge that I've put into the van to see what temps the tires are running in future trips. But from your description it looks like anything less than 8-10d increase is probably ok?

There's a lot of moving parts (no pun intended) to optimizing suspension and tires. This is good education for me especially related to these heavy rigs.

Yes, I can weld/fan pretty much whatever I need on the rear swaybar. But I'll poke around the yard and see if there's a bar out there that might work.
TX-Trek is offline   Reply With Quote
Old 02-16-2022, 08:15 PM   #11
Platinum Member
 
Join Date: Aug 2010
Location: Minnesota
Posts: 11,991
Default

Quote:
Originally Posted by TX-Trek View Post
Great info thank you.

Yes I remember seeing info about the 210s being hard on rear tires and I agree. I got concerned when the rear pressures hit almost 90 psi after driving awhile in warm temps and hot roads. I figured the tire temps were very high. I've got an IR gauge that I've put into the van to see what temps the tires are running in future trips. But from your description it looks like anything less than 8-10d increase is probably ok?

There's a lot of moving parts (no pun intended) to optimizing suspension and tires. This is good education for me especially related to these heavy rigs.

Yes, I can weld/fan pretty much whatever I need on the rear swaybar. But I'll poke around the yard and see if there's a bar out there that might work.

You probably will see more the 10 psi increase in the rears of a 210, some that have them may have better information on that part. What I found on our 190 was the the rear axle was also contributing to tire heat because the axle bearing tend to run very hot on the 9.75" axle and the heat goes through the aluminum wheels to tires. We way a large reduction in tire temps when I changed to the full floating axle. The hubs/wheel bearings now run essentially the same as the front hubs do for temp.


Since you have welding and fabrication skills, you should be able to make something work on the rear swaybar issue. The hard part will finding a bar that doesn't have the center hump up around the differential rear and is big enough. Straight bars can sneak through under the rear of the differential and not hang down far enough to be lower than the bottom of the differential case.
booster is online now   Reply With Quote
Old 02-17-2022, 03:47 PM   #12
Platinum Member
 
Join Date: Aug 2020
Location: TX
Posts: 179
Default

I'll bet that those axle bearings are taking some punishment. I can replace them anytime (assuming I can do it here at home vs. stuck on the road lol) but I will definitely keep track of temps with the IR gun.

I'm probably going into more detail than the average reader cares, but this is for somebody like me that may be considering what the heck to do on the front end and wants to see all actual results.

Here's some additional pics that show new coil spring clearance of control arm to frame and what I think is minimal bowing as compared to some of the other springs. It also looks to me that there is plenty of control arm clearance - I saw some other previous posts where the control arm was maybe .25" away from hitting the frame.

This is RF control arm forward leg.


This is RF control arm rear leg.


Installed spring, also shows the Sumospring bumper. Since previous posts I bumped up the airbag pressure by 5 psi and there is no issue with rebound driving around over good sized dips in the road. I'm going to leave the Sumosprings in place. Note also that they are the medium duty (black) versions. I can wiggle them a bit by hand, so I know they are not smashed into the control as previously. I think that if these were the heavy duty (yellow) versions, they may provide too much rebound. These seem to be about right and my guess is that the light duty (blue) would work fine as well since the front coils are now able to function properly.

The spring has about 3/8" clearance to the shock at the closest point. I never took a picture of the original spring but I do remember that it also had a bit of a bow in it. As mentioned, in test drives over all kinds of bumps, dips, RR tracks, etc. there is no noise, no weird pitching, just a much better absorption of those road obstacles. With the mindset that this is still essentially a heavy truck.

One additional comment - the shop took the upper ball joint loose and dropped the lower control arm with rotor/brake attached. They had loosened the brake hose bracket at the spindle, loosened the ABS wire and removed the sway bar link. I saw this and there was no issue with stretched out brake hose, etc. so I think this is a valid non-damage way to do the spring swap. The upper ball joint came loose with a couple of hammer wacks to the spindle, so zero damage to the boot.


Regarding the spring mods, here's what I would do in regard to the 45H0340AC Delco springs I used if i was doing another van. I'm not telling anyone they must do the same, but it may be of help in decision-making about that elusive final height. In my opinion this only applies to the Delco springs as the Moog/NAPA/etc are an unknown quantity to me, especially seeing the varying results with them.

I have no issue with spring rate. Height as delivered was 18.25", which is .5" over spec of 17.75". This can be significant in installed height, so in my opinion should be addressed.

I think Booster's suggestion to flatten out (taper) the end of the last top coil is good and I would do this first, then check the free height again. Since the top of the spring pocket is flat, this simply get the top of the spring flat as well. But as you've seen, the original spring is not exactly flat so either way will work.

In my case I removed a section of lower coil to get to 17.75" free height. Both springs seemed to have consistent spring rates as both sides have the same Z-height (4.8"). Fender lip height is within .125" and I think that's ok given the body mounts have settled different amounts. If I was simply trimming the bottom coil again on this particular Delco spring I would trim to 17.5" free height as I think this would get the Z-height closer to the ideal 4.3, maybe ending up at 4.5". Yes, small fractional changes make a difference.

Booster has repeated time and time again that all this is not a "lift", it's just restoring proper factory ride height. This is the single best fact to keep in mind and it yields excellent results.
TX-Trek is offline   Reply With Quote
Old 02-17-2022, 04:32 PM   #13
Platinum Member
 
Join Date: Aug 2010
Location: Minnesota
Posts: 11,991
Default

Smart on the wheel bearings, for sure, and change the differential fluid regularly with best you can get. I have switched to the Motul no antislip version now, and used to use Redline no antislip which is getting harder to find. The Motul is worth buying just for the pop out spout bottle.


Do you have the aluminum wheels with the wrong offset which will make the bearings run hotter than the stock steel, correct offset wheels.


At 36.5" wheel lip height and stock tires, you should be OK on hitting the frame with the control arm. It is when you get into the 37-38" you run into trouble. The Erb spings I tested ran at over 38" and I had almost no shock down travel unless I put it on the top of the lower arm instead of under and very little room to the frame.


Glad to hear the upped pressure made things better.


The way your shop did them is the way most would with stock height springs. If they had been the .5" longer they would have needed to compress them to get them into the deep upper pocket, most likely.
booster is online now   Reply With Quote
Old 02-17-2022, 05:12 PM   #14
Platinum Member
 
Join Date: Aug 2020
Location: TX
Posts: 179
Default

Quote:
Originally Posted by booster View Post
Smart on the wheel bearings, for sure, and change the differential fluid regularly with best you can get. I have switched to the Motul no antislip version now, and used to use Redline no antislip which is getting harder to find. The Motul is worth buying just for the pop out spout bottle.

Do you have the aluminum wheels with the wrong offset which will make the bearings run hotter than the stock steel, correct offset wheels.

At 36.5" wheel lip height and stock tires, you should be OK on hitting the frame with the control arm. It is when you get into the 37-38" you run into trouble. The Erb spings I tested ran at over 38" and I had almost no shock down travel unless I put it on the top of the lower arm instead of under and very little room to the frame.

Glad to hear the upped pressure made things better.

The way your shop did them is the way most would with stock height springs. If they had been the .5" longer they would have needed to compress them to get them into the deep upper pocket, most likely.
Rear axle lube is Redline weight per spec. It's an open unit so there was no need for the additive. Actually I think that Redline notes you can use it for posi units as well. Mainly keeping clean quality fluid in there, changed frequently.

Yup, the AR wheels are the offset type. Future plans may include changing them out, at this point with 76k miles no bearing issues yet, but I expect to replace between now and 100k miles. If I come across a set of Silverado wheels I may pick them up as I believe I saw mention of their correct offset. There will be a bit of research on this.

I saw frequent posts on trying to compress longer springs and the resultant bowing, excessive height etc. That was one reason I tried to really look at spring selection vs. installed height. I especially remember your review of the Erb springs it was very objective but unfortunately the results were way out of range.

A question on the back - at times I may want to lift the rear frame but not quite enough to get the rear wheels off the ground. Example is to get to the genset for maintenance. I know that the shocks and springs provide a limit to the amount of axle drop, but my concern is that this may cause the airbags to stretch and maybe be damaged by pulling their attachment bolts out of the top or bottom plate. What if the van is put on a lift that allows the rear suspension to hang? Is this a valid concern? Are limiting straps a solution? thanks.
TX-Trek is offline   Reply With Quote
Old 02-17-2022, 05:53 PM   #15
Platinum Member
 
Join Date: Aug 2010
Location: Minnesota
Posts: 11,991
Default

Quote:
Originally Posted by TX-Trek View Post
Rear axle lube is Redline weight per spec. It's an open unit so there was no need for the additive. Actually I think that Redline notes you can use it for posi units as well. Mainly keeping clean quality fluid in there, changed frequently.

Yup, the AR wheels are the offset type. Future plans may include changing them out, at this point with 76k miles no bearing issues yet, but I expect to replace between now and 100k miles. If I come across a set of Silverado wheels I may pick them up as I believe I saw mention of their correct offset. There will be a bit of research on this.

I saw frequent posts on trying to compress longer springs and the resultant bowing, excessive height etc. That was one reason I tried to really look at spring selection vs. installed height. I especially remember your review of the Erb springs it was very objective but unfortunately the results were way out of range.

A question on the back - at times I may want to lift the rear frame but not quite enough to get the rear wheels off the ground. Example is to get to the genset for maintenance. I know that the shocks and springs provide a limit to the amount of axle drop, but my concern is that this may cause the airbags to stretch and maybe be damaged by pulling their attachment bolts out of the top or bottom plate. What if the van is put on a lift that allows the rear suspension to hang? Is this a valid concern? Are limiting straps a solution? thanks.

The Redline callouts are very weird on the gear. The normal 75-90 was in the past for the clutch type posi units and the 75-90NS for no additive units like mechanical lockers or helical gear limited slips. NS is getting hard to find, at least the last time I looked and now the say the regular stuff for both. I think it is an open question as to if using the limited slip oilon open diffs is really not a good thing or not. The oil may not cling quite as well, but diffs spin fast a fling oil all over anyway. Nearly all of the shelf oils have the additive now, but sometimes not enough to keep a clutch type posi from chattering. Motul still lists there gear oils for open and lockers or clutch type posi.


If you find the right Silverado wheels, it would be good to grab them as they are getting hard to find. There are pix of them in some of the wheel threads and they are easy to spot in a yard because of the 6 cutouts instead of the normal 5 in the wheels for the 245-75-16 tires. The will be 16X7 steelies with 6 cutouts and +28mm offset.


Airlift says to take the air out of bags before you hang the axle which is a good idea, but you shocks should stop downtravel before anything would get damaged by hanging the axle. I hang ours a lot of the time if I need to get the axle out of the way of stuff and never had a problem. Nobody has ever mentioned any issues that I have seen, either. The hardest part is finding a place to support it on the driver side where they lowered the gas tank. I always jack on the axle anyway and drop it back on the stands.
booster is online now   Reply With Quote
Old 02-17-2022, 11:21 PM   #16
Platinum Member
 
Join Date: Aug 2020
Location: TX
Posts: 179
Default

Quote:
Originally Posted by booster View Post
The Redline callouts are very weird on the gear. The normal 75-90 was in the past for the clutch type posi units and the 75-90NS for no additive units like mechanical lockers or helical gear limited slips. NS is getting hard to find, at least the last time I looked and now the say the regular stuff for both. I think it is an open question as to if using the limited slip oilon open diffs is really not a good thing or not. The oil may not cling quite as well, but diffs spin fast a fling oil all over anyway. Nearly all of the shelf oils have the additive now, but sometimes not enough to keep a clutch type posi from chattering. Motul still lists there gear oils for open and lockers or clutch type posi.

If you find the right Silverado wheels, it would be good to grab them as they are getting hard to find. There are pix of them in some of the wheel threads and they are easy to spot in a yard because of the 6 cutouts instead of the normal 5 in the wheels for the 245-75-16 tires. The will be 16X7 steelies with 6 cutouts and +28mm offset.

Airlift says to take the air out of bags before you hang the axle which is a good idea, but you shocks should stop downtravel before anything would get damaged by hanging the axle. I hang ours a lot of the time if I need to get the axle out of the way of stuff and never had a problem. Nobody has ever mentioned any issues that I have seen, either. The hardest part is finding a place to support it on the driver side where they lowered the gas tank. I always jack on the axle anyway and drop it back on the stands.
I've noticed that same line of info on gear lubes, seems to be more questions raised than ever lol. I have a Ford 9 Trac-Loc in my 57 and I've always kept it simple - quality 75w90 with the 4 oz Ford additive. No issues over many years.

I'll look up wheel info and have that on hand when I look around at rear sway bars.

Thanks for the airbag info - I also use the axle for my jacks and then place stands. Looking underneath as you mentioned there's about zero frame space available anyway. I was just worried that I'd mess up a new bag.

thanks very much.
TX-Trek is offline   Reply With Quote
Old 02-17-2022, 11:57 PM   #17
Platinum Member
 
Join Date: Aug 2010
Location: Minnesota
Posts: 11,991
Default

Quote:
Originally Posted by TX-Trek View Post
I've noticed that same line of info on gear lubes, seems to be more questions raised than ever lol. I have a Ford 9 Trac-Loc in my 57 and I've always kept it simple - quality 75w90 with the 4 oz Ford additive. No issues over many years.

I'll look up wheel info and have that on hand when I look around at rear sway bars.

Thanks for the airbag info - I also use the axle for my jacks and then place stands. Looking underneath as you mentioned there's about zero frame space available anyway. I was just worried that I'd mess up a new bag.

thanks very much.

I think the older Trac lok were clutches so you are just right for them. Newer ones for the some of the trucks seem to be Torsen type spiral gear design. I have a Detroit Truetrac in my 96 Buick Roadmaster wagon and it is the gear type also. Get on the power a bit in a turn and it starts to chrip the inside tire because it is trying to lock them together. Gives that chirp/chirp/chirp sound like true locker just before something breaks.
booster is online now   Reply With Quote
Old 02-22-2022, 02:08 PM   #18
New Member
 
Join Date: Mar 2020
Location: Netherlands
Posts: 5
Default

Hi TX-rek,

Great work and documenting you have done!

I noticed you installed the Air lift bags with a lift block of 1.5". I would like to do the same on my Express 3500 van (No Roadtrek). However it also has the same spring setup and also a lift block of 1.5".

My question: Do the airbags extend far enough for this increased length/travel? I also noticed there are spacers available from 2" specifically for lifted vehicles but I'm not sure it is needed with this tiny lift.

Klaas
klaassybrand is offline   Reply With Quote
Old 02-22-2022, 09:34 PM   #19
Platinum Member
 
Join Date: Aug 2020
Location: TX
Posts: 179
Default

Happy to help, but the real tech help was from Booster and other posters that laid the groundwork.

I think that if all are about the same dimensions (see my post about the D-height which is frame to axle tube) then yes you can add the bags without issue. No different spacers needed.

What I don't know is what weight you're dealing with - is this a conversion van, cargo van etc? That will make a difference on the rebound you would get. I think Booster has the better perspective on this.

Be aware if you do this, the perch part of the spacer needs to be removed or flipped so it points outboard. My opinion is that cutting it is cleaner. And if you loosen the u bolts in any way you should not re-use them. The nuts lock in and slightly distort the threads.

Are you planning any front end suspension mods such as front sumo springs and/or coils? This relates to getting a balanced suspension that doesn't porpoise back and forth over dips.
TX-Trek is offline   Reply With Quote
Old 02-23-2022, 11:01 AM   #20
New Member
 
Join Date: Mar 2020
Location: Netherlands
Posts: 5
Default

Quote:
Originally Posted by TX-Trek View Post
Happy to help, but the real tech help was from Booster and other posters that laid the groundwork.

I think that if all are about the same dimensions (see my post about the D-height which is frame to axle tube) then yes you can add the bags without issue. No different spacers needed.

What I don't know is what weight you're dealing with - is this a conversion van, cargo van etc? That will make a difference on the rebound you would get. I think Booster has the better perspective on this.

Be aware if you do this, the perch part of the spacer needs to be removed or flipped so it points outboard. My opinion is that cutting it is cleaner. And if you loosen the u bolts in any way you should not re-use them. The nuts lock in and slightly distort the threads.

Are you planning any front end suspension mods such as front sumo springs and/or coils? This relates to getting a balanced suspension that doesn't porpoise back and forth over dips.
Yes i noticed Booster (and others) has been extremely helpfull also.

Thanks for pointing out the D-height, i missed that. I will have a look in a few weeks as my van is currently at body repair shop because of bad rockers.


I'm a little bit of an odd man out i think. I have the 2002 Express Explorer conversion van with 8 lug axle setup. I stripped completely last year and have been rebuilding it to a small camper van with a pop top. It's a light weight compared to the RTs i think. The combined weight is +-2900Kg (+- 6400 lbs)

My interest in the forum came with all the info regarding the suspension setups on this type of van, at least the 96-2002 version. I followed topics from Markopolo and Mattmobile as an example. Really helpfull!

Already done upgrades:

- Upgrade front coil springs to taller ones: Moog 81008
- Upgraded tires to 235/85/16 Yokohama Geolandar AT
- added the rear lift block 1.5" which leveled it out
- some minor trimming on front fenders

Ofcourse for my type of lighter van this was a bit of an (expensive) experiment. But i really wanted to generate some more ground clearance because of the same style ground effects on these conversion vans

After the "lift" I had some issues with the downtravel of the front upper control arm. As some already pointed out in other topics.
It was too close to the frame. Also the alignment would not workout and because of too much negative camber.

After some research i found out there are balljoint spacers available for the 90's C2500/3500 trucks which use the same control arms as Express 96-2002 vans.

I ordered them have now installed the spacers in between the balljoint and control arm. This virtually extends the control arm and gives a more horizontal upper arm. Right now have to find out if alignment is getting back to normal and if i will get enought caster with the correct camber angles.

I also am trying to see if the current shocks (Billstein B4600) will be tall enough and perhaps will upgrade them to taller ones for the 2003-later models. They do fit but i think are really limiting downtravel.

Will have to find out in a few weeks.

I'm in no means to hijack your topic TX-Trek...
but i think it needed a little explanation.
klaassybrand is offline   Reply With Quote
Reply


Posting Rules
You may not post new threads
You may not post replies
You may not post attachments
You may not edit your posts

BB code is On
Smilies are On
[IMG] code is On
HTML code is Off
Trackbacks are Off
Pingbacks are Off
Refbacks are Off


» Featured Campgrounds

Reviews provided by

Powered by vBadvanced CMPS v3.2.3

All times are GMT. The time now is 01:48 AM.


Powered by vBulletin® Version 3.8.8 Beta 4
Copyright ©2000 - 2024, vBulletin Solutions, Inc.