 |
|
 03-05-2022, 06:23 PM
|
#41
|
|
Platinum Member
Join Date: Aug 2020
Location: TX
Posts: 179
|
Agree with you completely, and a sincere thanks for the tech info you've provided. I got to where I just hated coming onto or going off of overpasses.
This has been a HUGE improvement.
|

|

|
|
04-21-2022, 08:40 PM
|
#42
|
|
Platinum Member
Join Date: Aug 2020
Location: TX
Posts: 179
|

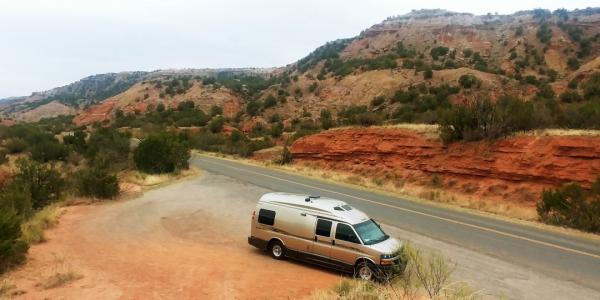
I thought I'd update this suspension thread now that we have about 4800 miles on the changes. It's been a good test as I sometimes think our travel route is more of a tour of every crap road out there.
Pic below is in Palo Duro Canyon, TX, our last stop on the way home to SE Texas. Beautiful.
 Cliff Note
 - all in all, an excellent upgrade, big difference in the long daily travel drives. Note that bumps ARE felt, it's a tubby 10k lb. van with stiff suspension and 10 ply tires inflated per capacity spec, but the bumps are dealt with in a very controllable manner. No surprises. As a reminder, per CAT scales, front is 3720#, rear is 5700# with full travel load.
Our last trip leg heading back home we dealt with 20-25mph crosswinds. All day  very tiring to hold the ship steady hour after hour. But I can say that even with some of the WHOA gusts that hit us, the corrections needed were controllable and didn't result in a seesaw reaction as they did before.
Not too scientific personal observations....
Front Suspension
The new springs have settled at about 36 in, right at about a 2 in height increase from the stock (overloaded) springs. I think that the combination of the new coil springs and the black Sumo Springs has provided the suspension travel and control that was lacking. In hindsight, I think that I could simply have ground the top coil as a flat, about .5 in worth and that would have worked fine. But I'm very pleased with the front end performance.
Rear Suspension
Happy with this as well. I know that the big overload can be removed, but just my preference, I left it in place. The airbags are a great addition and have performed very well. One issue that came up was a slow leak that developed at one of the bag fittings, easily fixed by re-taping the fitting and re-tightening. I noticed that both fittings tended to loosen up a bit, so something to check. I run a separate line to each air bag.
The new u-bolts have settled in at a consistent 130 ft lbs., checked with a torque wrench along the way.
The sweet spot for us is a fender lip height of 37.5 in, or about 21 in from the top of the wheel center cap to the fender lip. This equates to anywhere from 40-55 psi in the bags depending on load. It's simpler for me to just get the fender lip height set rather than go with psi settings. This height/psi easily accommodates bumps and dips. Sometimes we do hit a very large unwelcome dip or bump, we definitely feel that impact but we don't go flying around everywhere as we did before.
Tires
This isn't about any particular brand but more about the speed rating and temperature/pressure rise I've observed. Before we left on this last trip I bought 2 new tires to replace date code 2015 tires. We had already replaced 2 tires about a year ago, so we essentially now had a new set of tires. Brand new tires (120R) were placed on the back and the almost-new tires (120Q) were moved to the front. They are 2 different brands, similar tread pattern, good quality. What I noticed was that the pressure rise with the new R rated tires was less than it had been with the Q rated tires, even though it's a very small difference in speed rating (99 mph vs 106 mph). I wonder though, if there's some sort of exponential construction difference needed at that fairly high speed, meaning that heat will build rapidly. The Q rated front tires would increase by 8-9 psi, and the R rated rear tires increased by no more than 5 psi. Just an observation.
Hub Temps
Hub temps generally ran in the 105-115d range. I noticed that the rear hubs (semi-floater) tended to stay in the 105-110d range. I'm aware of the tendency to eat hubs with the higher offset AR wheels and I'm going to grease the front hubs per the method that Booster describes.
On the rears, I think that proper fill level in the differential is key not only for axle bearing lubrication but for cooling as well. Many folks seldom check or change that fluid and quite often it gets low. As it gets lower there's less of it to get into the axle tubes and the end bearings. Less lube = hotter bearings and possible early failure, especially since they see a substantial load with these vans. My personal preference is Redline synthetic, and I typically change that fluid much more frequently than 100k miles. In general I regard changing of all fluids and filters as cheap insurance in the long run.
Future Musings
I'm considering the addition of a rear swaybar. I do like the version that Booster made and am thinking of duplicating that fabrication vs buying the (what I consider expensive) Roadmaster bar that clears the genset. I'll note that the front swaybar has already had all poly bushings/endlinks installed.
I've also talked with the truck suspension shop that installed the front coil springs about installing a dual rear wheel axle from an Express cargo vehicle. This is just in the "thinking about it" stage and I will need to take measurements and do some research, but I think this will help stability quite a bit. I'm able to fabricate and paint small fiberglass fender flares if needed so it's all legal and looks nice. If feasible that's a post for another day.
So again, in my opinion for a 210, changing out the front coils, adding Sumos and adding the 5K capacity airbags is one of the best upgrades you can do. And I think that combining with removal of the heavy overload spring yields even a more compliant ride as others have found.
|
|
|
|
|
04-22-2022, 10:52 PM
|
#43
|
|
Platinum Member
Join Date: Aug 2010
Location: Minnesota
Posts: 11,987
|
Quote:
Originally Posted by TX-Trek

Hub Temps
Hub temps generally ran in the 105-115d range. I noticed that the rear hubs (semi-floater) tended to stay in the 105-110d range. I'm aware of the tendency to eat hubs with the higher offset AR wheels and I'm going to grease the front hubs per the method that Booster describes.
On the rears, I think that proper fill level in the differential is key not only for axle bearing lubrication but for cooling as well. Many folks seldom check or change that fluid and quite often it gets low. As it gets lower there's less of it to get into the axle tubes and the end bearings. Less lube = hotter bearings and possible early failure, especially since they see a substantial load with these vans. My personal preference is Redline synthetic, and I typically change that fluid much more frequently than 100k miles. In general I regard changing of all fluids and filters as cheap insurance in the long run.
Future Musings
I'm considering the addition of a rear swaybar. I do like the version that Booster made and am thinking of duplicating that fabrication vs buying the (what I consider expensive) Roadmaster bar that clears the genset. I'll note that the front swaybar has already had all poly bushings/endlinks installed.
I've also talked with the truck suspension shop that installed the front coil springs about installing a dual rear wheel axle from an Express cargo vehicle. This is just in the "thinking about it" stage and I will need to take measurements and do some research, but I think this will help stability quite a bit. I'm able to fabricate and paint small fiberglass fender flares if needed so it's all legal and looks nice. If feasible that's a post for another day.
So again, in my opinion for a 210, changing out the front coils, adding Sumos and adding the 5K capacity airbags is one of the best upgrades you can do. And I think that combining with removal of the heavy overload spring yields even a more compliant ride as others have found.
|
Glad all is well. This is two successful 210 upgrades recently so great information.
On the hub temps. The fronts look typical, but the rears look low to me based on what we and others have seen with semi floating Dana 60s. We also use Redline and were probably 30* or more hotter as were some others. We were using the 2007 axle that had the failure issues, though, so might have something to do with it. What part of the hub/wheel were you taking the temp at? The AR has a hollow cap that if it is on will run much cooler than the hub, I think, and you can't actually shoot the hub temp with it on. You would have to check the wheel temp right next to the cover.
Rear swaybars are a great addition to lessen wander and wind push, IMO probably near number one in improvement. You are heavier in the rear than the 190s so if you do build one like ours you probably would want the 1.5" diameter bar, especially if you are considering ever removing the overload leaf.
There is a long discussion from a while ago about a guy that put a dually in his Chevy. Did you see that one? I am not a dually fan, but that is just my preference.
Good job and great update.
|
|
|
|
|
04-23-2022, 12:26 AM
|
#44
|
|
Platinum Member
Join Date: Aug 2020
Location: TX
Posts: 179
|
Hi Booster, at the risk of being tedious on this I thought an update after being on the road could be useful 
I took wheel temps at the face of the wheel adjacent to the center caps. It seemed to me as well that the rear hub temps were lower than what I expected but that's what I ended up with. We were running no higher than 65 mph. However, this will remind me to check again carefully on the next trip. All I can add is that the rear gear lube was fresh and filled full, plus I had flushed the gearset before adding new fluid. I wonder if the new clean fluid will yield higher temps as it sees more use? Don't know.
I saw the other info on the dual axle setup but I'm a long way yet from any action. Especially since everything seems to function well right now. And I think that a rear swaybar will be an easier project yielding very noticeable improvement. Thanks for info on diameter, I was wondering about that.
Something that struck me was in looking at previous posts on coil spring heights along with the recent info on the Moog 81004 lengths in the other gentleman's post and my experience with the delco springs is that the received length of coils seems to be a variance. You can't seem to count on a set dimension.
Appreciate all the feedback.
|
|
|
|
|
09-07-2022, 08:47 PM
|
#45
|
|
Platinum Member
Join Date: Aug 2020
Location: TX
Posts: 179
|
We're about to head out on a meandering no-schedule road trip into NM, AZ, towards Grand Canyon and up through UT and CO areas. Being somewhat lazy when on the road, I decided to install an Air-Lift 25812 dual airbag compressor/control vs using a 12v tire inflator at each of the airbag manual fill valves that were installed at the rear bumper when I installed the airbags.
I typically end up adjusting air pressures to maintain around 37-38 in height at the rear fender lips. The pressure will vary side to side depending on fuel, water, etc. load changes so I just work with fender lip height instead of a specific air pressure.
I liked the idea of a small on-board compressor and the ability to adjust air pressure individually side to side with a touch of a button. So I thought about my installation criteria (yours may be different):
• I did not really need to have the gauges/control up at the front dash. I don’t have to monitor the air pressures that closely – even if there was a major failure, the van is still on the overload springs and the airbags have an internal jounce bumper. So maybe not optimum comfort, but we can still travel if needed. I do carry spare air line, fittings, for intermittent failure possibilities, or simple leaks.
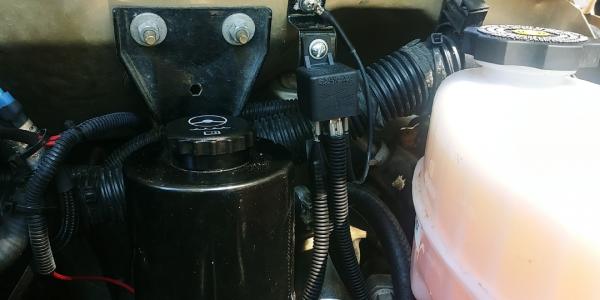
• Air-lift suggests tapping into a 15amp ignition-on circuit, but I don’t like doing that. If that primary circuit is in use, and you add additional 10-12amp of compressor load, you can overload the wiring to the fusebox. I did want to have an ignition-on control, so I went with a relay connected to full battery voltage for power and used an ignition-on circuit at the fusebox to energize the relay, which only requires milli-amps. All connections were fused. One 12ga wire runs to the rear of the van for compressor power. Power is only present in that wire when the ignition is on (“run”), because that’s when the relay is energized. Everything is off when the ignition is off.
Relay is just to the right of the steering fluid reservoir:
• Also, on later model vehicles, the Body Control Module (BCM) powers many of the fusebox circuits. I didn’t want to use a BCM circuit so I looked in the wiring diagrams for an ignition switch related “on” circuit, only to use to energize the relay. Wound up using a 10a instrument cluster power circuit. Plus, I didn’t want to use a circuit that would make the van non-drivable if there was a major failure – example is don’t tie into a fuel injector or fuel pump circuit, stuff like that.
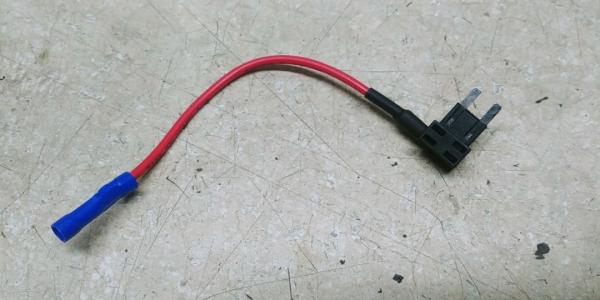
• I didn’t like the fuse taps in the Air-Lift kit, they piggy-back into the terminals along with the fuse legs, so they wind up spreading the terminals too far, which can cause things to get loose. I used a pre-made double fuse tap for the tie-in to the 10amp circuit needed to energize the relay.
I was poking around the forums and found a post from Booster that was very helpful. If I remember right, he had mounted the airbag controller in the left rear storage compartment - the one for electrical cable and water connections. In our van, we also have a power management system and outdoor shower setup there, so space gets pretty tight after the electrical cable is stored. But that led me to install the control/switch panel right above the right area rear storage area – you see it when the right rear van door is opened. Doesn’t interfere with anything, I can grab my tape measure to check rear fender heights and make any air adjustments, quick and easy at fuel/food stops, after overnight etc.
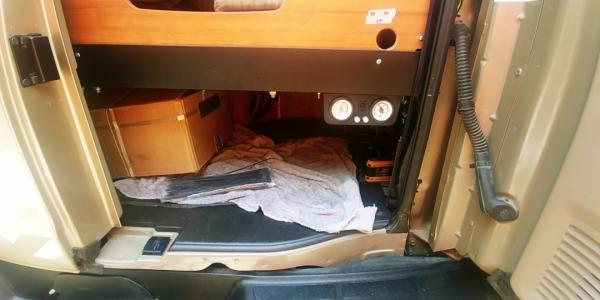
I mounted the compressor itself in the forward wall of the rear storage area, had to pretzel myself into the space, but I survived. As you can see, the air lines and pressure sensors are also in the rear storage area. Still leaves plenty of room in there for our stuff, and everything is out of the elements. One hole in the floor was all I needed for the power wire and air lines to tee into the existing air bag lines. The rear bumper mounted air fill valves remain in place in case the compressor fails and I need to use an air chuck/pump to add air to each side.
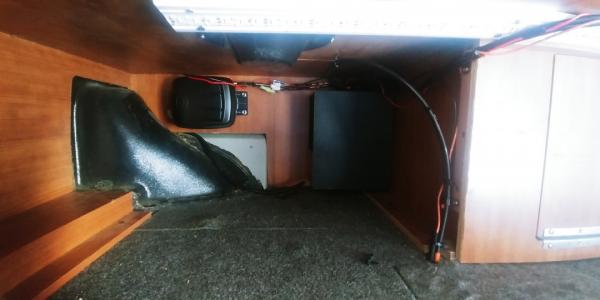
So far so good, a couple of days and no air leaks. I've also come back since the pics to further clean up routing and loom the storage area wiring. Although I have extra fittings, if air leakage becomes an issue, I can change out the fittings to compression type later on.
|
|
|
|
|
09-07-2022, 09:38 PM
|
#46
|
|
Platinum Member
Join Date: Aug 2010
Location: Minnesota
Posts: 11,987
|
Very nice install, I am sure you will like having the compressor onboard. I know I sure do. We didn't have a choice when on ours because we have an air powered tire lifter on it and have to have air for that.
Our compressor is much larger in size than yours with a tank and mounted underbody on the frame rail in front of the drop floor. What is the brand and model number of what you used? It would interesting to look at the specs.
|
|
|
|
|
09-07-2022, 09:57 PM
|
#47
|
|
Platinum Member
Join Date: Aug 2020
Location: TX
Posts: 179
|
The kit was Air Lift 25812, but it's a very light duty cycle compressor. The compressor part number is 16060, instructions state not to run for more than 4 minutes. But that's not been an issue, it only takes 1-2 minutes to inflate the bags.
I've only found general info -100 psi max and 12 amps running amperage, nothing really on duty cycle specs.
I much prefer a "real" air suspension compressor with tank but I'm thinking this lighter duty setup should work ok for the foreseeable future for the air pressures (45-60 depending on loading) needed in this van. I hope lol.
Thanks for your info on the airbag post, got me headed in the right direction.
|
|
|
|
|
09-08-2022, 12:03 AM
|
#48
|
|
Platinum Member
Join Date: Dec 2021
Location: Louisiana and Colorado
Posts: 131
|
Let us know how it improved the ride and handling. Especially does it dampen the bounce in the back?
__________________
Enjoying life at our Colorado cabin
2011 Roadtrek C210P
RZR 570, Ranger 1000
Previously: 1999 36' Foretravel, 1998 Newell, 1993 Newell
|
|
|
|
|
09-08-2022, 12:19 AM
|
#49
|
|
Platinum Member
Join Date: Aug 2020
Location: TX
Posts: 179
|
Quote:
Originally Posted by folivier
Let us know how it improved the ride and handling. Especially does it dampen the bounce in the back?
|
The ride won't change. All I did was change the method of getting air into the air bags. Ride description is noted earlier in this thread.
|
|
|
|
|
09-08-2022, 12:25 AM
|
#50
|
|
Platinum Member
Join Date: Aug 2010
Location: Minnesota
Posts: 11,987
|
As has been mentioned previously, improving the rear ride quality is mostly a function of getting the big overload leaf out of the suspension that is used. Raising the van with the the lower spring rate air bags high enough to eliminate most contacts with overload works pretty well but you have to be pretty high. Removing the overload leaf lets you run lower if you choose to without losing the better rear ride.
|
|
|
|
|
09-08-2022, 12:47 AM
|
#51
|
|
Platinum Member
Join Date: Aug 2020
Location: TX
Posts: 179
|
Absolutely! In our case the van is still using the big overloads, but we feel a lot less impact with the air bags. Hugely improved ride but note that the front suspension has also been modified as described.
|
|
|
|
|
09-08-2022, 07:32 PM
|
#52
|
|
Silver Member
Join Date: Aug 2017
Location: Massachusetts
Posts: 73
|
Link to the overload removal thread. booster did this on a 190 and I have done it on a 210, both with good results. I have to run significantly higher pressures on the 210, IIRC I'm up to 70psi on both now.
__________________
Stewart, Brenda and kids
2006 Roadtrek 210 Versatile, 400W Solar, 320AH LiFePO4. Suspension mods: Front: Moog 81004 coil springs. Rear: SuperSteer Track Bar, AirLift airbags with integrated bump stop, 2" lift blocks, removed overload leafs. All around: Bilsteins, 265-75R16 K02's
|
|
|
|
|
09-30-2022, 11:09 PM
|
#53
|
|
Platinum Member
Join Date: Aug 2020
Location: TX
Posts: 179
|
Still on the road, about 4k miles so far. Totally satisfied with the convenience of onboard airbag control. Adjustments have actually been very minor, easy to check the air pressures which indicate no air loss. Only slight pressure changes have shown due to outside temp and/or heat from driving.
|
|
|
|
|
10-08-2022, 08:03 PM
|
#54
|
|
Silver Member
Join Date: Oct 2021
Location: AR
Posts: 64
|
Thanks for this thread. I have ordered coils, airbags, brakes, and extra sumos for a similar suspension upgrade. Bilsteins and 80/65 tire pressure helped a lot. Hopefully I can find the right shop to pay attention and also use the measurements given as a good guide for my 2010 210 Chevy Simplicity. I'll be interested in your sway bar progress too.
|
|
|
|
|
10-08-2022, 09:47 PM
|
#55
|
|
Platinum Member
Join Date: Aug 2020
Location: TX
Posts: 179
|
Glad it helped. Next step is to go with Bilsteins as the recently replaced oem shocks wear out. Some of the roads we've been on have felt like their purpose was to beat the shocks to death.
I'm a fan of the 65/80 pressures, made a big difference.
I'm researching rear sway bars on other large trucks , 1 ton and over. I think this is a much needed "final" thing to round off the suspension changes. The big trucks have the general diameter needed and I've seen some that hug the diff closely, enough to clear the genset. I can fabricate frame mounts and links accordingly but it would nice to buy a wrecking yard bar for $25 and use about $50 worth of materials to complete the assembly. Booster had the right idea on his setup - I'm just not going to pay $700 for a Roadmaster rear bar.
|
|
|
|
|
10-08-2022, 09:56 PM
|
#56
|
|
Platinum Member
Join Date: Aug 2010
Location: Minnesota
Posts: 11,987
|
Quote:
Originally Posted by TX-Trek
Glad it helped. Next step is to go with Bilsteins as the recently replaced oem shocks wear out. Some of the roads we've been on have felt like their purpose was to beat the shocks to death.
I'm researching rear sway bars on other large trucks , 1 ton and over. I think this is a much needed "final" thing to round off the suspension changes. The big trucks have the general diameter needed and I've seen some that hug the diff closely, enough to clear the genset. I can fabricate frame mounts and links accordingly but it would nice to buy a wrecking yard bar for $25 and use about $50 worth of materials to complete the assembly. Booster had the right idea on his setup - I'm just not going to pay $700 for a Roadmaster rear bar.
|
I have a fabricated rear bar on our van, but not junk yard. It is made from off the shelf parts except for the mounts.
I used a splined, straight quick change bar, like they use in spint cars on the track, and with arms to match the bar. Urethane aftermarket pivot bushings and stock front link arms for the van from Napa. I just welded up brackets to put in the right place to clear the diffy and the generator, welded the right ends on the arms to accept the standard links and make simple mounts for the frame to pick up the links. It has worked great for years with the only times it was out was when I changed the rear axle to the 10.5" full floater which required the bar to move back a little to clear the diffy cover and when I removed the rear overload leafs to go up 1/8" to compensate for the lower rear springrate. I will try to find the writeup on that, which may not be on this forum.
on edit: I found the discussion and build info on the rear bar I used buried in another discussion.
https://www.classbforum.com/forums/f....html#post7329
|
|
|
|
|
10-08-2022, 11:07 PM
|
#57
|
|
Platinum Member
Join Date: Aug 2020
Location: TX
Posts: 179
|
I spent time looking carefully at your design process/thinking and fabrication. I think by far it's the best setup I've seen for these vans.
|
|
|
|
|
|
 Posting Rules
|
You may not post new threads
You may not post replies
You may not post attachments
You may not edit your posts
HTML code is Off
|
|
|
|
 » Recent Threads
 |
|
|
|
|
|
|
|
|
|
|
|
|
|
|
|
|
|
|
|
|
|
|
|
|
|
|
|
|
|
|
|
|
|


 Linear Mode

