Hi friends, I'm not typically on this forum but I thought I'd share my replacement of the failed Dometic AC/Heat pump unit in our 2010 RT 210P (Chevy Express 3500 chassis).....
I'm aware that you can do a direct swap with another new Dometic unit, but I didn't want to do that. It wasn't a matter of cost, even though a new one is about $900-1000, not including labor to install. I could afford that, but my perspective was to install a regular window unit in place of the Dometic to facilitate any later replacement needed if we were on the road. Nothing can cut a trip short in warm/hot weather than a failed ac unit, especially if you decide to find and get a direct replacement installed. By using a regular ac unit, it's much easier to find at Walmart, Home Depot, etc etc and swap it out in about half a day with regular tools you would typically carry with you. And of course, the cost of a window ac unit is much less than a replacement Dometic.
I did check out the non-cooling Dometic unit in terms of circuitry, controls, and start/run capacitors, etc. Conclusion was that there was an issue with the compressor itself and cost to repair was not feasible.
I've also seen comments centering around the ability of a regular window unit to withstand vehicle vibrations. We have not had any problems with that, and our family has used standard window ac units for years, added to a Class C motorhome.
So, here's what I did. As mentioned, now that the initial installation is done, it's a straightforward swap if I ever need to replace the ac unit out in the wilds somewhere. I'll also add the usual disclaimer - this has worked great for us, but do this at your risk, not my fault if you mess things up

There's a lot of trial fit and removal needed as well to ensure that the new unit fits properly. But now that's it all done any future replacement is not difficult at all, the hardest part will be hoisting the old unit out and new unit up onto the rear shelf.
Your needs may be different, but we didn't really care about the heat pump nor the wall mounted thermostat. We have the propane furnace if needed and it's just as easy to control the new unit from its face panel or the remote control supplied with it. That remote also has a thermostat, so you can program the ac unit to work with the remote thermostat, which can be placed anywhere in the van.
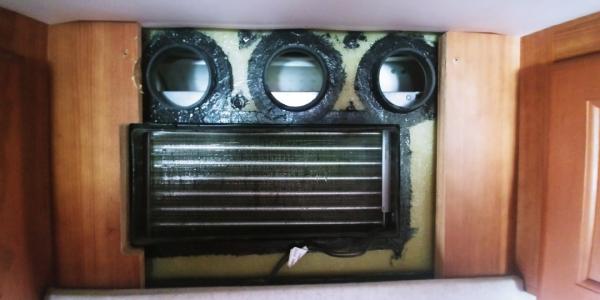
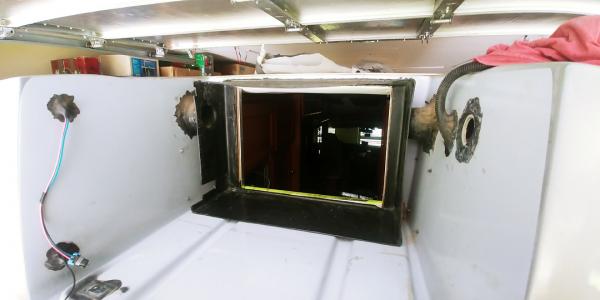
Here's the Dometic unit with the face grill removed. The entire unit sits in a fiberglass pan whose face runs up the front side, with openings for the return and supply airflow.
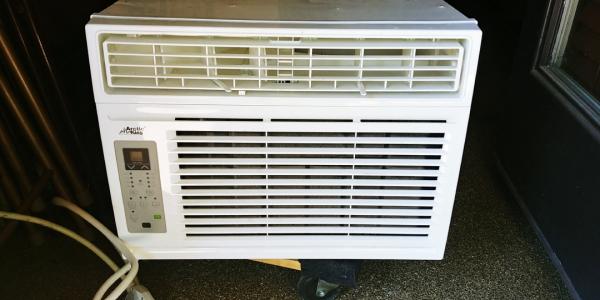
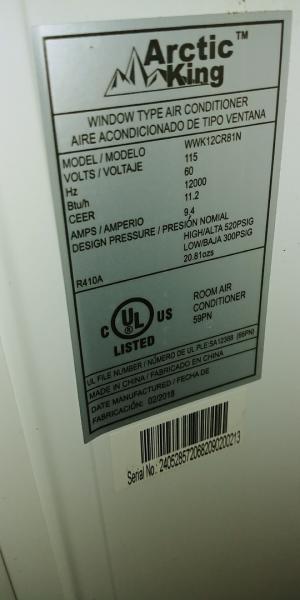
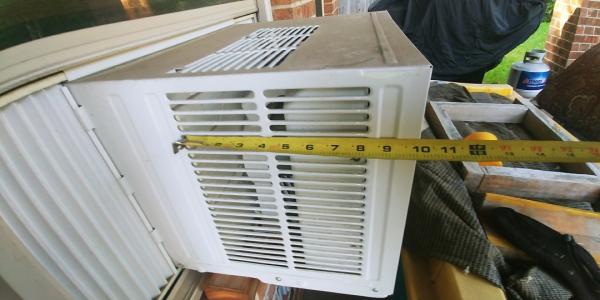
Here's the window unit ac that replaced the Dometic, dimensions are very close to the Dometic, but the bottom front brackets need to be trimmed down to 1/4" (I think they are about 1/2" deep). It's a snug top-to-bottom fit into the opening but it does fit fine.
Although I guess it all worked, I never really liked the plastic corrugated cover that RT installed on the Dometic.
The top isolation panel was also sagging after all these years, it should have been metal like the side isolation panels.
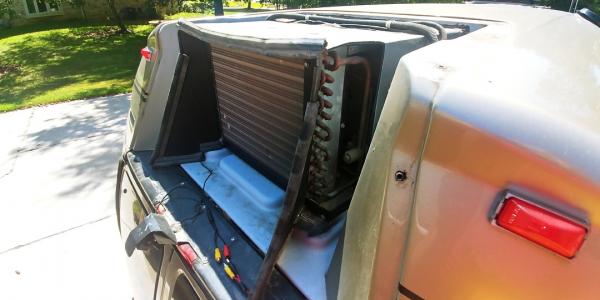
Those panels are very important to isolate inlet air going into the sides and top of the ac unit from the exhaust blowing out the rear of the unit. If not installed correctly, the unit will short-cycle warm exhaust air right back into the inlet side.
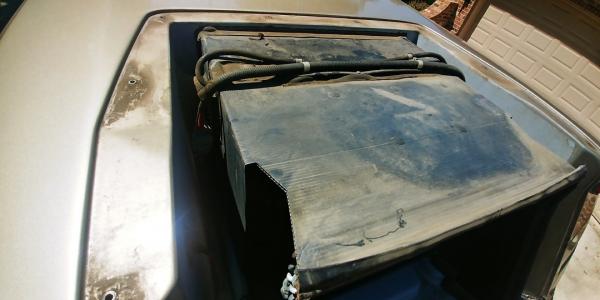
After the fiberglass rain cover was removed, the Dometic was unplugged from the multi connector plug. The power cord routed to the passenger side inner cabinet so that was carefully unplugged and pulled out. There were also 2 brackets at the rear of the Dometic unit that were removed - these are what essentially holds the unit in place.
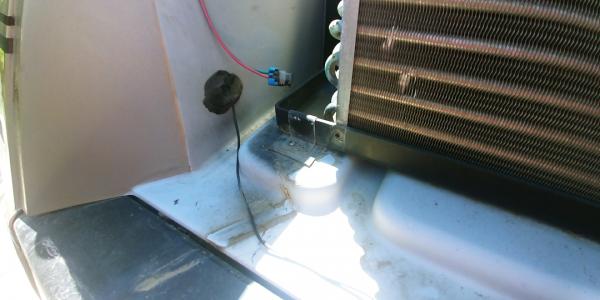
This left the fiberglass pan open, and it got a good cleaning. Wire/plug on the left was for clearance lights on the fiberglass rain cover, lower left was for rear camera. Wire loom on the right was for the original controls and was not re-used, I just left it in place to the side. You can also see the hole for the power cord. This needed to be enlarged slightly for the new unit plug.
 WARNING! - I used a multi-tool to enlarge the opening for the new unit plug as well as at the interior panels to widen the opening. The panels can get very hot with the blade, possibly hot enough to burn! I kept a spray water bottle handy and went slow with cutting. VERY IMPORTANT!
There's a black plastic sleeve that the Dometic unit slid into, this stays in place but it got cut back to accommodate the inlet air grills on the new unit.
Here's the cleaned pan and the black plastic sleeve cut back for the new unit, with the front face opening also opened up for the new unit :
This is what I mean about the black plastic sleeve needing to be cut back to accommodate the side grills of the new unit. You don't want to cover those grills or airflow will suffer. The sleeve was cut back to the solid cover part of the unit and allowed for flex flashing to attach the sleeve to the unit.
The interior panel was opened up by cutting out the fiberglass face and was also widened by cutting the side panels so the new unit would of course slide into place. I also added some aluminum trim at the sides for a clean edge finish. Green tape protected the fabric at the bottom.
Top-to-bottom fit is very snug with the new ac unit. If you looked underneath the unit, there's a couple of stamped steel ledge brackets. These needed to be cut down to 1/4" height in my installation. When the final opening work was completed, there was a 1/4" front lip left on the fiberglass plan that the original and new ac units sat into. I needed to cut a slot into that small lip so the power cord could be routed back alongside the ac unit and into the rear cabinet. I then siliconed that slot and cord just to be sure no condensate or rainwater ever crept into that area. That 1/4" lip left on the pan also keeps any moisture away from the interior.
I then paid attention to the rear air isolation panels. The original side panels are metal and only needed a slight mod to fit really nicely into place. I also used the original weatherstripping on their outer edge. You can see the left panel fairly well here. I also made a couple of new rear base retention brackets for the new ac unit. You will want to be sure that the front-to-back location of the new unit enables the rear air isolation panels to rest against the fiberglass rain cover when it's installed.
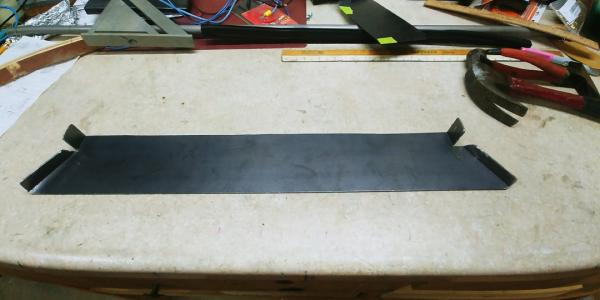
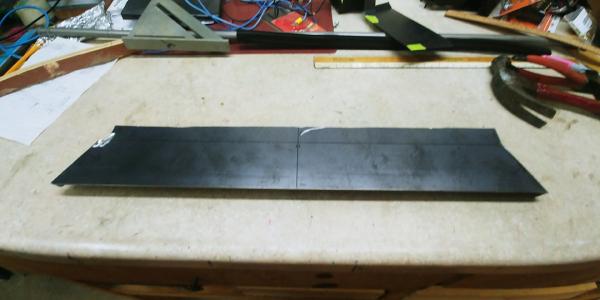
The upper corrugated plastic panel had pretty much sagged and failed, so I made a new upper panel out of 20ga steel and was able to use the original weatherstrip on it as well.
The results were very good, the panels were now held securely in place.
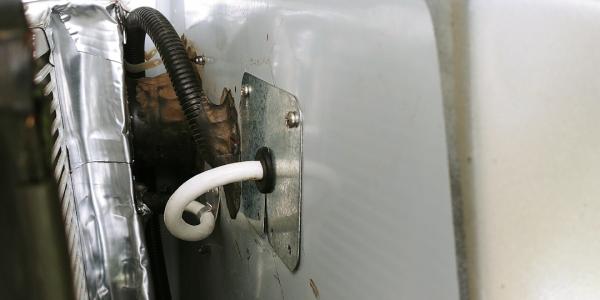
The new powercord got metal flashing at the entry point. It was later also covered with flex weatherproof flashing.
I used QuikRoof (or Peel n Seal) flex weatherproof flashing to seal the black plastic sleeve to the metal shell of the new ac unit. That attachment alone can keep the unit in place, but along with the 2 rear base brackets and the side isolation panels also screwed down that ac unit isn't going anywhere.
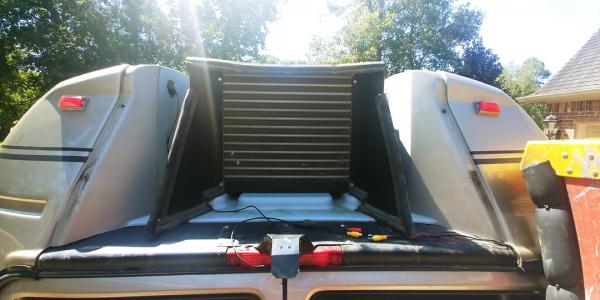
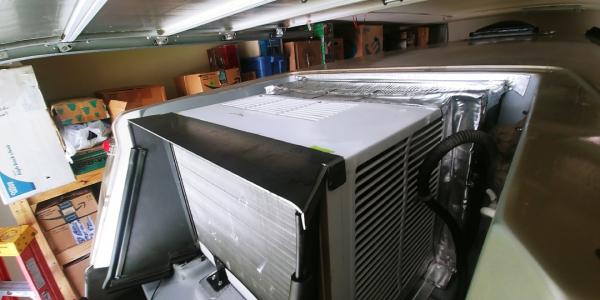
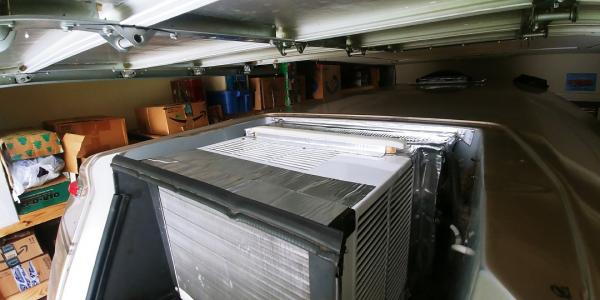
Here's that picture again of the unit fully installed.
I also added three 2" diameter black aluminum vents into the fiberglass rain cover just to ensure that the top inlet area of the new ac unit got airflow. I think the side inlets have plenty of exposure but these top vents don't hurt anything. Any rain inflow is minimal through the grill vents and just simply drains out the rear of the pan. They are located to coordinate with the inlet grill of the ac unit.

This is final installed look of the new unit. No drips or drabs and it works great.

The new ac unit has no trouble keeping the interior cold. On a 95d day, after approx. 20 min of runtime, the temp indicator at the unit was 68d and the temp at the front of the van was 72. I also really like the fan throw from the unit. On medium speed you can feel cold air at the front seats.
One item you may have noticed is that the new unit no longer feeds the 2 small vents that are located directly above the sleeping area. We don't notice any problem as the interior gets cooled well enough that this change is not a factor. We also typically have a small 110v fan plugged in at the galley area that circulates air everywhere.
I also noticed that the new ac unit startup is also easier on the genset. Much less of that hiccup when a load is placed on the genset and no problems with hot outlet or circuit popping etc. Be aware that the plug typically does get warm as part of normal operation.
All in all, I'm really pleased with this installation.


 Threaded Mode

